本文主要講解企業級OSS物件儲存服務
Spring Boot Starter
制作,開箱即用,為計畫進行賦能。基於AmazonS3協定,適配市面上的物件儲存服務如:阿裏雲OSS、騰訊COS、七牛雲OSS、
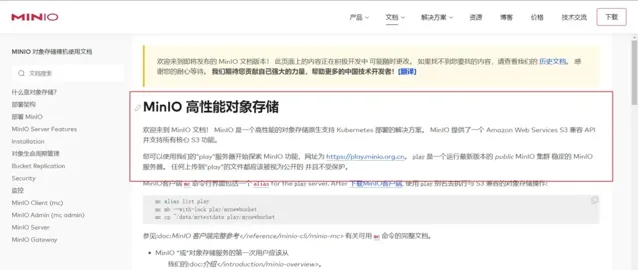
MInio
等等
什麽是OSS?
OSS(Object Storage Service),物件儲存服務,物件儲存服務是一種使用HTTP API儲存和檢索物件的工具。就是將系統所要用的檔上傳到雲硬碟上,該雲硬碟提供了檔下載、上傳、預覽等一系列服務,具備版本,許可權控制能力,具備數據生命周期管理能力這樣的服務以及技術可以統稱為OSS
OSS在計畫中的使用
OSS物件儲存在目前大部份計畫中必不可少的存在,如下圖所示。
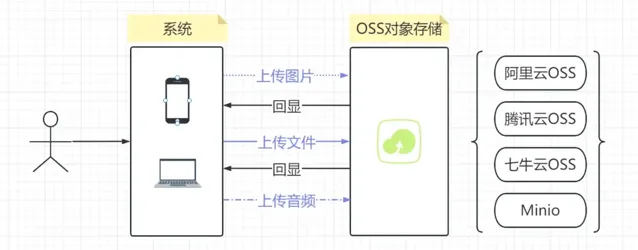
一般計畫使用OSS物件儲存服務,主要是對圖片、檔、音訊等物件集中式管理許可權控制,管理數據生命周期等等,提供上傳,下載,預覽,刪除等功能。
透過OSS部署前端計畫。
什麽是AmazonS3
「
https://docs.aws.amazon.com/zh_cn/AmazonS3/latest/userguide/Welcome.html
Amazon Simple Storage Service(Amazon S3,Amazon簡便儲存服務)是 AWS 最早推出的雲服務之一,經過多年的發展,S3 協定在物件儲存行業事實上已經成為標準。
提供了統一的介面 REST/SOAP 來統一存取任何數據
對 S3 來說,存在裏面的數據就是物件名(鍵),和數據(值)
不限量,單個檔最高可達 5TB,可動態擴容。
高速,每個 bucket 下每秒可達 3500 PUT/COPY/POST/DELETE 或 5500 GET/HEAD 請求。
具備版本,許可權控制能力
具備數據生命周期管理能力
作為一個物件儲存服務,S3 功能真的很完備,行業的標桿,目前市面上大部份OSS物件儲存服務都支持AmazonS3,本文主要講解的就是基於AmazonS3實作我們自己的
Spring Boot Starter
。
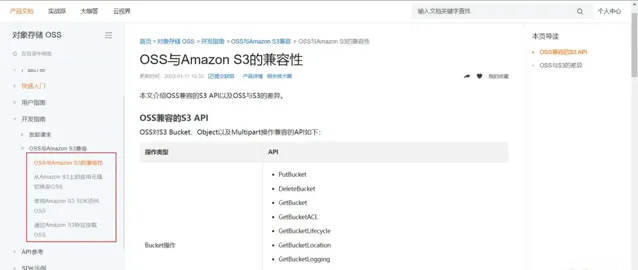
阿裏雲OSS相容S3
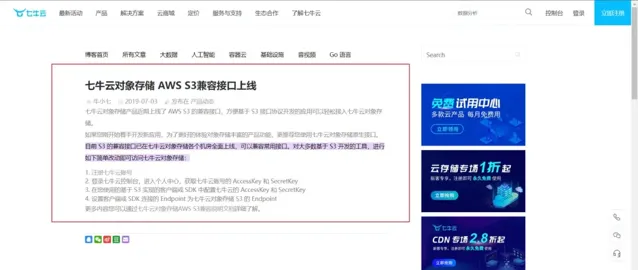
七牛雲物件儲存相容S3
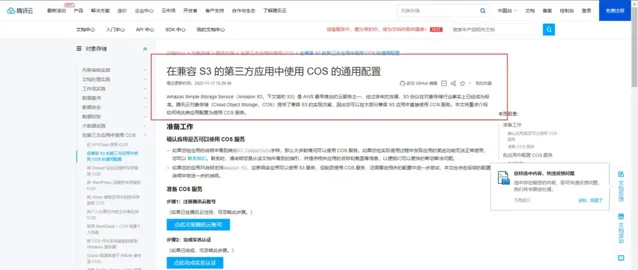
騰訊雲COS相容S3
Minio相容S3
我們為什麽要基於AmazonS3實作 Spring Boot Starter
原因:市面上OSS物件儲存服務基本都支持AmazonS3,我們封裝我們的自己的starter那麽就必須考慮適配,遷移,可延伸。
比喻說我們今天使用的是阿裏雲OSS對接阿裏雲OSS的SDK,後天我們使用的是騰訊COS對接是騰訊雲COS,我們何不直接對接AmazonS3實作呢,這樣後續不需要調整程式碼,只需要去各個雲服務商配置就好了。
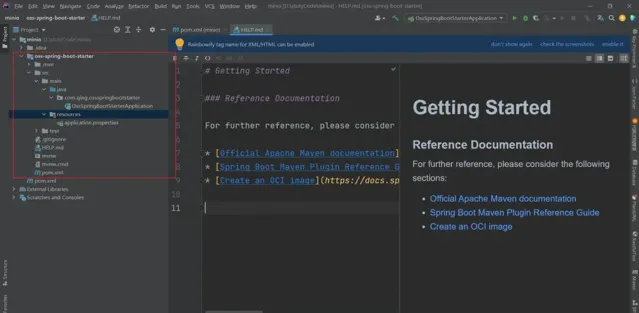
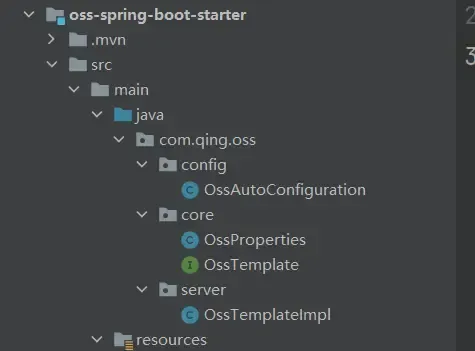
建立一個SpringBoot計畫
如下圖所示:建立一個SpringBoot計畫。
我們取名為
oss-spring-boot-starter
。

如下圖所示,建立成功,讓我們進入制作的過程吧。
開啟maven倉庫,搜尋minio
地址【mvnrepository.com/】
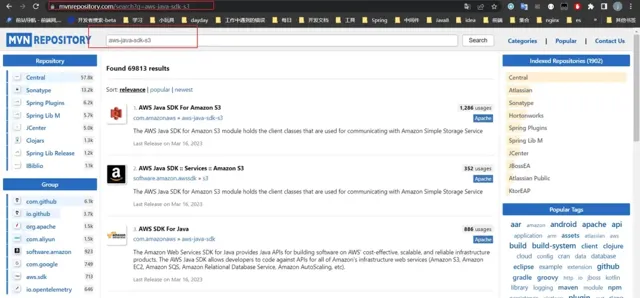
這裏我們選擇第一個,點進去後我們選擇1.12.423版本,做演示。
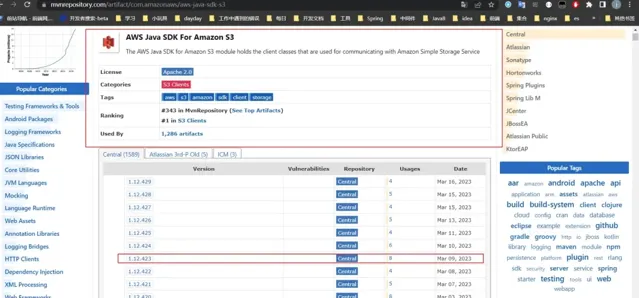
<!-- https://mvnrepository.com/artifact/com.amazonaws/aws-java-sdk-s3 -->
<dependency>
<groupId>com.amazonaws</groupId>
<artifactId>aws-java-sdk-s3</artifactId>
<version>1.12.423</version>
</dependency>
本計畫的Pom檔
<?xml version="1.0" encoding="UTF-8"?>
<project xmlns="http://maven.apache.org/POM/4.0.0" xmlns:xsi="http://www.w3.org/2001/XMLSchema-instance"
xsi:schemaLocation="http://maven.apache.org/POM/4.0.0 https://maven.apache.org/xsd/maven-4.0.0.xsd">
<modelVersion>4.0.0</modelVersion>
<parent>
<groupId>org.springframework.boot</groupId>
<artifactId>spring-boot-starter-parent</artifactId>
<version>2.7.9</version>
<relativePath/> <!-- lookup parent from repository -->
</parent>
<groupId>com.qing</groupId>
<artifactId>oss-spring-boot-starter</artifactId>
<version>0.0.1-SNAPSHOT</version>
<name>oss-spring-boot-starter</name>
<description>Demo oss-spring-boot-starter</description>
<properties>
<java.version>1.8</java.version>
<aws.version>1.12.423</aws.version>
<hutool.version>5.8.5</hutool.version>
</properties>
<dependencies>
<dependency>
<groupId>org.springframework.boot</groupId>
<artifactId>spring-boot-starter</artifactId>
</dependency>
<!-- https://mvnrepository.com/artifact/com.amazonaws/aws-java-sdk-s3 -->
<dependency>
<groupId>com.amazonaws</groupId>
<artifactId>aws-java-sdk-s3</artifactId>
<version>${aws.version}</version>
</dependency>
<dependency>
<groupId>cn.hutool</groupId>
<artifactId>hutool-core</artifactId>
<version>${hutool.version}</version>
</dependency>
<dependency>
<groupId>org.springframework.boot</groupId>
<artifactId>spring-boot-starter-test</artifactId>
<scope>test</scope>
</dependency>
<dependency>
<groupId>org.projectlombok</groupId>
<artifactId>lombok</artifactId>
<version>RELEASE</version>
<scope>compile</scope>
</dependency>
</dependencies>
</project>
程式碼如下,註釋寫的非常清楚了。
@ConfigurationProperties
報紅不用管後門會解決。
@Data: 註解是lombok,生成get set方法的。
@ConfigurationProperties(prefix = "oss"): 將配置檔中oss開頭的內容繫結到此物件中
大概就是如果想要使用我們的jar他的配置檔有這些配置
oss.endpoint=xxx
oss.accessKey=xxx
oss.secretKey=xxx
/**
* @Author JiaQIng
* @Description Oss配置類
* @ className OssProperties
* @Date 2023/3/18 17:51
**/
@Data
@ConfigurationProperties(prefix = "oss")
public class OssProperties {
/**
* 物件儲存服務的URL
*/
private String endpoint;
/**
* 區域
*/
private String region;
/**
* true path- style nginx 反向代理和S3預設支持 path style模式 {http://endpoint/bucketname}
* false supports virtual-hosted- style 阿裏雲等需要配置為 virtual-hosted- style 模式{http://bucketname.endpoint}
* 只是url的顯示不一樣
*/
private Boolean path styleAccess = true;
/**
* Access key
*/
private String accessKey;
/**
* Secret key
*/
private String secretKey;
/**
* 最大執行緒數,預設:100
*/
private Integer maxConnections = 100;
}
OssTemplate:oss樣版介面,此介面主要是對oss操作的方法的一個介面,定義為介面主要是滿足可延伸原則,就是其他人使用了我們的jar包,實作此介面可以自訂相關操作。
如下面所示程式碼:定義了一些對oss操作的方法。
/**
* @Author JiaQIng
* @Description oss操作樣版
* @ className OssTemplate
* @Date 2023/3/18 18:15
**/
public interface OssTemplate {
/**
* 建立bucket
* @param bucketName bucket名稱
*/
void createBucket(String bucketName);
/**
* 獲取所有的bucket
* @return
*/
List<Bucket> getAllBuckets();
/**
* 透過bucket名稱刪除bucket
* @param bucketName
*/
void removeBucket(String bucketName);
/**
* 上傳檔
* @param bucketName bucket名稱
* @param objectName 檔名稱
* @param stream 檔流
* @param contextType 檔型別
* @throws Exception
*/
void putObject(String bucketName, String objectName, InputStream stream, String contextType) throws Exception;
/**
* 上傳檔
* @param bucketName bucket名稱
* @param objectName 檔名稱
* @param stream 檔流
* @throws Exception
*/
void putObject(String bucketName, String objectName, InputStream stream) throws Exception;
/**
* 獲取檔
* @param bucketName bucket名稱
* @param objectName 檔名稱
* @return S3Object
*/
S3Object getObject(String bucketName, String objectName);
/**
* 獲取物件的url
* @param bucketName
* @param objectName
* @param expires
* @return
*/
String getObjectURL(String bucketName, String objectName, Integer expires);
/**
* 透過bucketName和objectName刪除物件
* @param bucketName
* @param objectName
* @throws Exception
*/
void removeObject(String bucketName, String objectName) throws Exception;
/**
* 根據檔前置查詢檔
* @param bucketName bucket名稱
* @param prefix 字首
* @param recursive 是否遞迴查詢
* @return S3ObjectSummary 列表
*/
List<S3ObjectSummary> getAllObjectsByPrefix(String bucketName, String prefix, boolean recursive);
}
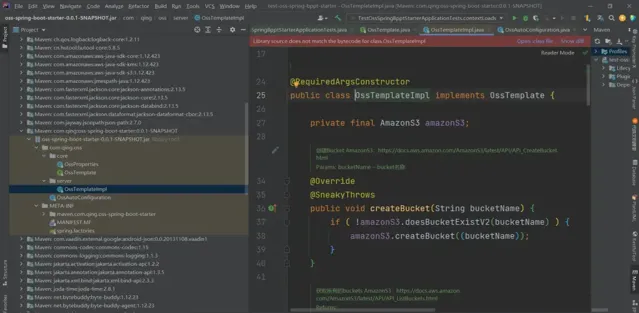
如下圖所示:實作
OssTemplate
裏面的方法,呼叫
AmazonS3JavaSDK
的方法實作。
AmazonS3提供了眾多的方法,這裏就不寫全部的了,公司要用到那些就寫那些吧,後續擴充套件就行。
AmazonS3介面地址如下
「
https://docs.aws.amazon.com/AmazonS3/latest/API/API_CreateBucket.html
此類解釋:就是實作
OssTemplate
介面,引入AmazonS3客戶端呼叫對應的介面。
使用的註解解釋:
@RequiredArgsConstructor: lombok的註解,替代@Autowired。
@SneakyThrows: lombok的註解,丟擲異常。
/**
* @Author JiaQIng
* @Description OssTemplate的實作類
* @ className OssTemplateImpl
* @Date 2023/3/18 19:02
**/
@RequiredArgsConstructor
public class OssTemplateImpl implements OssTemplate {
private final AmazonS3 amazonS3;
/**
* 建立Bucket
* AmazonS3:https://docs.aws.amazon.com/AmazonS3/latest/API/API_CreateBucket.html
* @param bucketName bucket名稱
*/
@Override
@SneakyThrows
public void createBucket(String bucketName) {
if ( !amazonS3.doesBucketExistV2(bucketName) ) {
amazonS3.createBucket((bucketName));
}
}
/**
* 獲取所有的buckets
* AmazonS3:https://docs.aws.amazon.com/AmazonS3/latest/API/API_ListBuckets.html
* @return
*/
@Override
@SneakyThrows
public List<Bucket> getAllBuckets() {
return amazonS3.listBuckets();
}
/**
* 透過Bucket名稱刪除Bucket
* AmazonS3:https://docs.aws.amazon.com/AmazonS3/latest/API/API_DeleteBucket.html
* @param bucketName
*/
@Override
@SneakyThrows
public void removeBucket(String bucketName) {
amazonS3.deleteBucket(bucketName);
}
/**
* 上傳物件
* @param bucketName bucket名稱
* @param objectName 檔名稱
* @param stream 檔流
* @param contextType 檔型別
* AmazonS3:https://docs.aws.amazon.com/AmazonS3/latest/API/API_PutObject.html
*/
@Override
@SneakyThrows
public void putObject(String bucketName, String objectName, InputStream stream, String contextType) {
putObject(bucketName, objectName, stream, stream.available(), contextType);
}
/**
* 上傳物件
* @param bucketName bucket名稱
* @param objectName 檔名稱
* @param stream 檔流
* AmazonS3:https://docs.aws.amazon.com/AmazonS3/latest/API/API_PutObject.html
*/
@Override
@SneakyThrows
public void putObject(String bucketName, String objectName, InputStream stream) {
putObject(bucketName, objectName, stream, stream.available(), "application/octet-stream");
}
/**
* 透過bucketName和objectName獲取物件
* @param bucketName bucket名稱
* @param objectName 檔名稱
* @return
* AmazonS3:https://docs.aws.amazon.com/AmazonS3/latest/API/API_GetObject.html
*/
@Override
@SneakyThrows
public S3Object getObject(String bucketName, String objectName) {
return amazonS3.getObject(bucketName, objectName);
}
/**
* 獲取物件的url
* @param bucketName
* @param objectName
* @param expires
* @return
* AmazonS3:https://docs.aws.amazon.com/AmazonS3/latest/API/API_GeneratePresignedUrl.html
*/
@Override
@SneakyThrows
public String getObjectURL(String bucketName, String objectName, Integer expires) {
Date date = new Date();
Calendar calendar = new GregorianCalendar();
calendar.setTime(date);
calendar.add(Calendar.DAY_OF_MONTH, expires);
URL url = amazonS3.generatePresignedUrl(bucketName, objectName, calendar.getTime());
return url.toString();
}
/**
* 透過bucketName和objectName刪除物件
* @param bucketName
* @param objectName
* AmazonS3:https://docs.aws.amazon.com/AmazonS3/latest/API/API_DeleteObject.html
*/
@Override
@SneakyThrows
public void removeObject(String bucketName, String objectName) {
amazonS3.deleteObject(bucketName, objectName);
}
/**
* 根據bucketName和prefix獲取物件集合
* @param bucketName bucket名稱
* @param prefix 字首
* @param recursive 是否遞迴查詢
* @return
* AmazonS3:https://docs.aws.amazon.com/AmazonS3/latest/API/API_ListObjects.html
*/
@Override
@SneakyThrows
public List<S3ObjectSummary> getAllObjectsByPrefix(String bucketName, String prefix, boolean recursive) {
ObjectListing objectListing = amazonS3.listObjects(bucketName, prefix);
return objectListing.getObjectSummaries();
}
/**
*
* @param bucketName
* @param objectName
* @param stream
* @param size
* @param contextType
* @return
*/
@SneakyThrows
private PutObjectResult putObject(String bucketName, String objectName, InputStream stream, long size,
String contextType) {
byte[] bytes = IOUtils.toByteArray(stream);
ObjectMetadata objectMetadata = new ObjectMetadata();
objectMetadata.setContentLength(size);
objectMetadata.setContentType(contextType);
ByteArrayInputStream byteArrayInputStream = new ByteArrayInputStream(bytes);
// 上傳
return amazonS3.putObject(bucketName, objectName, byteArrayInputStream, objectMetadata);
}
}
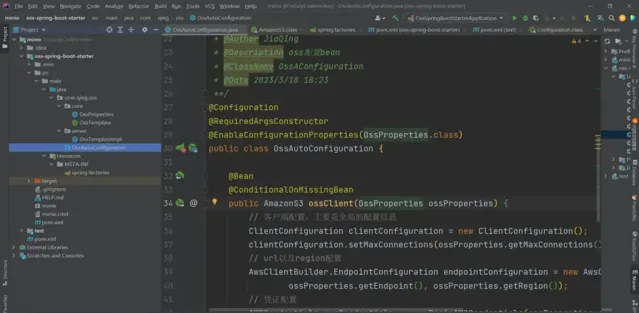
OssAutoConfiguration
:自動裝配配置類,自動裝配的bean有AmazonS3和OssTemplate
所使用的註解:
@RequiredArgsConstructor: lombok的註解,替代@Autowired。
@EnableConfigurationProperties(OssProperties. class): 自動裝配我們的配置類
@Bean: 聲明式bean。
@ConditionalOnMissingBean: 修飾bean的一個註解,當你的bean被註冊之後,註冊相同型別的bean,就不會成功,它會保證你的bean只有一個,即你的例項只有一個。多個會報錯。
@ConditionalOnBean(AmazonS3. class): 當給定的在bean存在時,則例項化當前Bean。
/**
* @Author JiaQIng
* @Description oss配置bean
* @ className OssAConfiguration
* @Date 2023/3/18 18:23
**/
@Configuration
@RequiredArgsConstructor
@EnableConfigurationProperties(OssProperties. class)
public class OssAutoConfiguration {
@Bean
@ConditionalOnMissingBean
public AmazonS3 ossClient(OssProperties ossProperties) {
// 客戶端配置,主要是全域的配置資訊
ClientConfiguration clientConfiguration = new ClientConfiguration();
clientConfiguration.setMaxConnections(ossProperties.getMaxConnections());
// url以及region配置
AwsClientBuilder.EndpointConfiguration endpointConfiguration = new AwsClientBuilder.EndpointConfiguration(
ossProperties.getEndpoint(), ossProperties.getRegion());
// 憑證配置
AWSCredentials awsCredentials = new BasicAWSCredentials(ossProperties.getAccessKey(),
ossProperties.getSecretKey());
AWSCredentialsProvider awsCredentialsProvider = new AWSStaticCredentialsProvider(awsCredentials);
// build amazonS3Client客戶端
return AmazonS3Client.builder().withEndpointConfiguration(endpointConfiguration)
.withClientConfiguration(clientConfiguration).withCredentials(awsCredentialsProvider)
.disableChunkedEncoding().withPath styleAccessEnabled(ossProperties.getPath styleAccess()).build();
}
@Bean
@ConditionalOnBean(AmazonS3. class)
public OssTemplate ossTemplate(AmazonS3 amazonS3){
return new OssTemplateImpl(amazonS3);
}
}
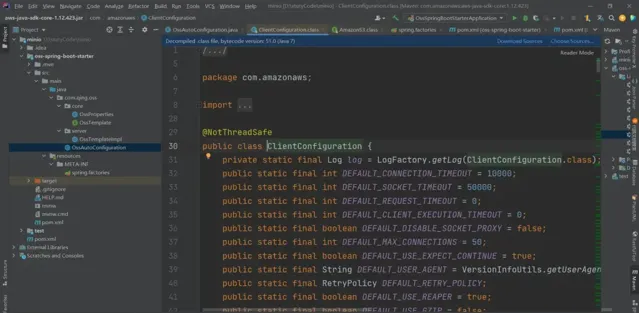
ClientConfiguration物件
客戶端配置,主要是全域的配置資訊
看下圖,有很多的配置,有的指定了預設值有的沒有,可以到AmazonS3的官方文件熟悉相關配置,配置你所需要指定的配置資訊等。
只有你真正的理解那些配置的作用才能避免線上的bug。有興趣的同學可以看一下。
在resources目錄下新增META-INF包,下面新建spring.factories檔。
這種形式也是"約定大於配置"的體現。讀過spring-boot源碼的同學應該知道,這裏就不給大家講解了。
如下所示:
org.springframework.boot.autoconfigure.EnableAutoConfiguration=\
com.qing.oss.OssAutoConfiguration
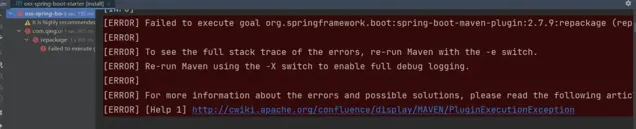
執行install打包到我們的本地倉庫
把springboot工程的啟動類,配置檔幹掉,幹掉Test包。
最重要的是幹掉pom檔的
spring-boot-maven-plugin
,要不然install報錯。
<build>
<plugins>
<plugin>
<groupId>org.springframework.boot</groupId>
<artifactId>spring-boot-maven-plugin</artifactId>
</plugin>
</plugins>
</build>
這樣我們的一個
oss-spring-boot-starter
就完成了。
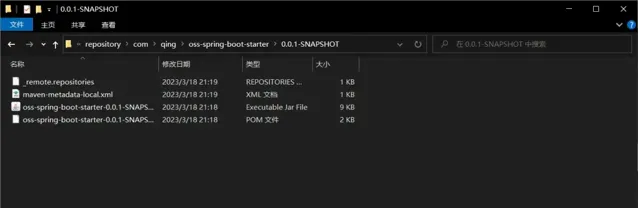
執行install打包成jar到我們的本地倉庫。
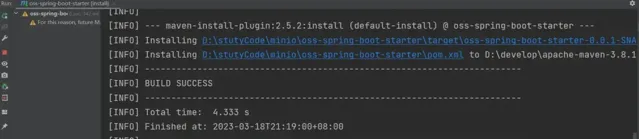
到我們的本地倉庫就能看到我們的
oss-spring-boot-starter
測試
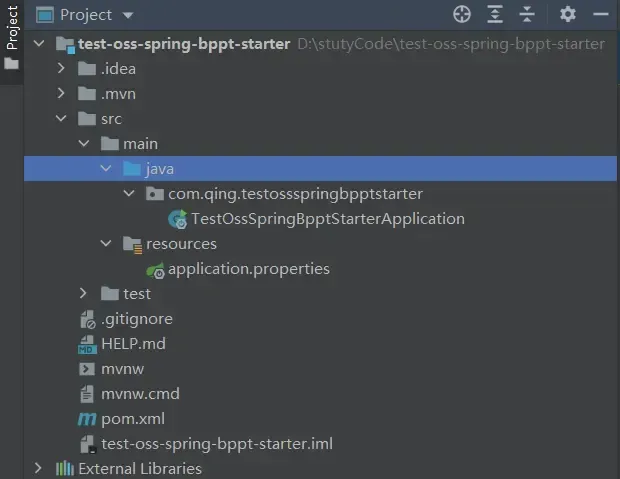
建立一個spring-boot工程當作我們的測試工程
這裏就不演示怎麽建立計畫了。直接看下圖吧
pom檔新增我們的oss-spring-boot-starter依賴
新增版本全域配置
<properties>
<oss.version>0.0.1-SNAPSHOT</oss.version>
</properties>
新增
oss-spring-boot-starter
依賴
<dependency>
<groupId>com.qing</groupId>
<artifactId>oss-spring-boot-starter</artifactId>
<version>${oss.version}</version>
</dependency>
重新整理maven後可以看到我們依賴加進來了。

解決打包沒有註釋的問題
可以發現我們的依賴沒有註釋沒有Javadoc註釋。
在我們的
oss-string-boot-starter
的pom檔下加入下面外掛程式,重新install一下就好了。
<build>
<plugins>
<!-- 在打好的jar包中保留javadoc註釋,實際會另外生成一個xxxxx-sources.jar -->
<plugin>
<groupId>org.apache.maven.plugins</groupId>
<artifactId>maven-source-plugin</artifactId>
<executions>
<execution>
<id>attach-sources</id>
<goals>
<goal>jar</goal>
</goals>
</execution>
</executions>
</plugin>
</plugins>
</build>
在我們的測試計畫裏面重新整理一下maven可以看到已經帶註釋了。
配置檔添加oss-spring-boot-starter所需要的配置
這裏填寫你的阿裏雲,騰訊cos,七牛雲,minio等等的配置。
下面我給大家演示的是Minio
oss.endpoint=xxx
oss.accessKey=xxx
oss.secretKey=xxx
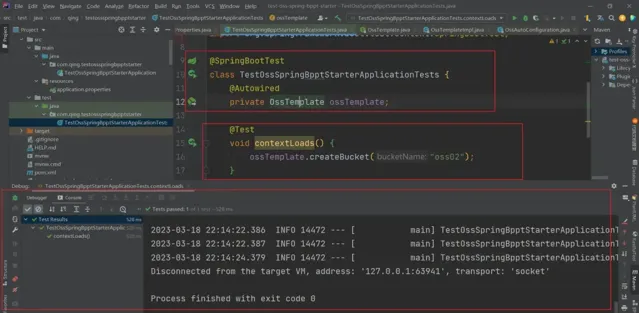
編寫測試方法
如下圖所示,編寫測試方法,執行測試方法成功。
@SpringBootTest
class TestOssSpringBpptStarterApplicationTests {
@Autowired
private OssTemplate ossTemplate;
@Test
void contextLoads() {
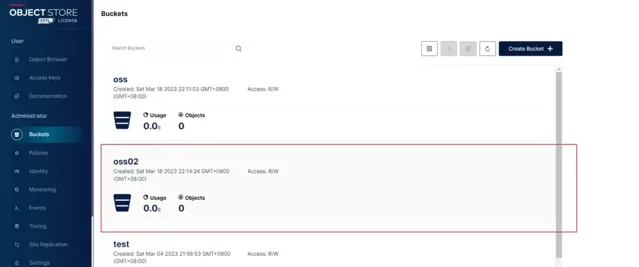
ossTemplate.createBucket("oss02");
}
}
到我的Minio中檢視發現測試成功。
後記
本文主要講解企業級OSS物件儲存服務Spring Boot Starter制作,開箱即用,為計畫進行賦能。基於AmazonS3協定,適配市面上的大部份物件儲存服務如:阿裏雲OSS、騰訊COS、七牛雲OSS、MInio等等。
源碼:請關註微信公眾號,回復數位106


