下面我將總結構建Http3的經驗,以Token Gateway的計畫為例,請註意使用Http3之前你需要知道它的限制,
Windows
Windows 11 版本 22000 或更高版本/Windows Server 2022。
TLS 1.3 或更高版本的連線。
Linux
已安裝
libmsquic
包。
實作講解
首先我們需要拉取我們的程式碼
git clone https://gitee.com/hejiale010426/Gateway.git
cd Gateway
然後我們開啟
Program.cs
#region FreeSql型別轉換
Utils.TypeHandlers.TryAdd(typeof(Dictionary<string, string>), new StringJsonHandler<Dictionary<string, string>>());
Utils.TypeHandlers.TryAdd(typeof(RouteMatchEntity), new StringJsonHandler<RouteMatchEntity>());
Utils.TypeHandlers.TryAdd(typeof(List<DestinationsEntity>), new StringJsonHandler<List<DestinationsEntity>>());
Utils.TypeHandlers.TryAdd(typeof(string[]), new StringJsonHandler<string[]>());
#endregion
var builder = WebApplication.CreateBuilder(args);
builder.Configuration.Getp(nameof(JwtOptions))
 .Get<JwtOptions>();
builder.WebHost.UseKestrel(options =>
{
// 配置多個網域名稱證書
 options.ConfigureHttpsDefaults(adapterOptions =>
 {
 adapterOptions.ServerCertificateSelector = (_, name) =>
 {
// 從Certificate服務中獲取
if (string.IsNullOrEmpty(name) ||
 !CertificateService.CertificateEntityDict.TryGetValue(name, outvar certificate)) returnnew X509Certificate2();
var path = Path.Combine("/data/", certificate.Path);
if (File.Exists(path)) returnnew X509Certificate2(path, certificate.Password);
 Console.ForegroundColor = ConsoleColor.Red;
 Console.WriteLine($"證書檔不存在:{path}");
 Console.ResetColor();
thrownew Exception($"證書檔不存在:{path}");
 };
 });
});
builder.WebHost.ConfigureKestrel(kestrel =>
{
 kestrel.Limits.MaxRequestBodySize = null;
 kestrel.ListenAnyIP(8081, portOptions =>
 {
 portOptions.Protocols = HttpProtocols.Http1AndHttp2AndHttp3;
 portOptions.UseHttps();
 });
 kestrel.ListenAnyIP(8080, portOptions =>
 {
 portOptions.Protocols = HttpProtocols.Http1AndHttp2;
 });
});
#region Jwt
builder.Services
 .AddAuthorization()
 .AddJwtBearerAuthentication();
#endregion
builder.Services.Configure<KestrelServerOptions>(options =>
{
 options.Limits.MaxRequestBodySize = int.MaxValue;
});
builder.Services.Configure<FormOptions>(x =>
{
 x.ValueLengthLimit = int.MaxValue;
 x.MultipartBodyLengthLimit = int.MaxValue; // if don't set default value is: 128 MB
 x.MultipartHeadersLengthLimit = int.MaxValue;
});
builder.Services.ConfigureHttpJsonOptions(options =>
{
 options.SerializerOptions.Converters.Add(new JsonStringEnumConverter());
 options.SerializerOptions.Converters.Add(new JsonDateTimeConverter());
});
builder.Services.AddHostedService<GatewayBackgroundService>();
builder.Services.AddCors(options =>
{
 options.AddPolicy("AllowAll",
 builder => builder
 .SetIsOriginAllowed(_ => true)
 .AllowAnyMethod()
 .AllowAnyHeader()
 .AllowCredentials());
});
builder.Configuration.Getp(nameof(RequestOptions)).Get<RequestOptions>();
builder.Services.AddMemoryCache();
builder.Services.AddSingleton<RequestLogMiddleware>();
builder.Services.AddSingleton<StaticFileProxyMiddleware>();
builder.Services.AddSingleton<RequestLogService>();
builder.Services.AddSingleton<GatewayService>();
builder.Services.AddSingleton<CertificateService>();
builder.Services.AddSingleton<FileStorageService>();
builder.Services.AddSingleton<StaticFileProxyService>();
builder.Services.AddSingleton<TestService>();
builder.Services.AddSingleton<SettingService>();
builder.Services.AddSingleton<AuthorityService>();
builder.Services.AddSingleton<IContentTypeProvider, FileExtensionContentTypeProvider>();
builder.Services.AddSingleton<IFreeSql>(_ =>
{
var directory = new DirectoryInfo("/data");
if (!directory.Exists)
 {
 directory.Create();
 }
returnnew FreeSqlBuilder()
 .UseConnectionString(DataType.Sqlite, builder.Configuration.GetConnectionString("DefaultConnection"))
 .UseMonitorCommand(cmd => Console.WriteLine($"Sql:{cmd.CommandText}")) //監聽SQL語句
 .UseAutoSyncStructure(true) //自動同步實體結構到資料庫,FreeSql不會掃描程式集,只有CRUD時才會生成表。
 .Build();
});
// 使用記憶體載入配置
builder.Services.AddReverseProxy()
 .LoadFromMemory(GatewayService.Routes, GatewayService.Clusters);
var app = builder.Build();
app.UseCors("AllowAll");
app.UseMiddleware<RequestLogMiddleware>();
app.UseMiddleware<StaticFileProxyMiddleware>();
// 配置MiniApis服務
app.MapRequestLog();
app.MapStaticFileProxy();
app.MapFileStorage();
app.MapGateway();
app.MapAuthority();
app.MapCertificate();
app.MapSetting();
app.UseAuthentication();
app.UseAuthorization();
app.MapReverseProxy();
await app.RunAsync();
上面是完整的程式碼,我們不過多講解,只講解HTTP3需要哪些配置
首先,我們的Gateway支持動態載入證書,而
HTTP3
是強制使用證書的,我們在這裏提供了動態配置HTTP3的實作。
builder.WebHost.UseKestrel(options =>
{
// 配置多個網域名稱證書
 options.ConfigureHttpsDefaults(adapterOptions =>
 {
 adapterOptions.ServerCertificateSelector = (_, name) =>
 {
// 從Certificate服務中獲取
if (string.IsNullOrEmpty(name) ||
 !CertificateService.CertificateEntityDict.TryGetValue(name, outvar certificate)) returnnew X509Certificate2();
var path = Path.Combine("/data/", certificate.Path);
if (File.Exists(path)) returnnew X509Certificate2(path, certificate.Password);
 Console.ForegroundColor = ConsoleColor.Red;
 Console.WriteLine($"證書檔不存在:{path}");
 Console.ResetColor();
thrownew Exception($"證書檔不存在:{path}");
 };
 });
});
上面配置好了證書,下面我們配置啟用HTTP3,下面我們對於容器會監聽倆個埠8080,8081,8080是Http埠,所以不需要開啟HTTP3,我們在監聽8081的時候修改了協定為
HttpProtocols.Http1AndHttp2AndHttp3
,然後
portOptions.UseHttps()
強制使用HTTPS,
Http1AndHttp2AndHttp3
是自動支持多個協定,如果HTTP3不支持則會降級支持HTTP2如果HTTP2不支持則降級支持HTTP1,由於瀏覽器不確定你是否支持HTTP3所以會先請求一個HTTP2或HTTP1協定的請求,如果支持的話框架會自動給響應頭返回一個
Alt-Svc
的值。
builder.WebHost.ConfigureKestrel(kestrel =>
{
 kestrel.Limits.MaxRequestBodySize = null;
 kestrel.ListenAnyIP(8081, portOptions =>
 {
 portOptions.Protocols = HttpProtocols.Http1AndHttp2AndHttp3;
 portOptions.UseHttps();
 });
 kestrel.ListenAnyIP(8080, portOptions =>
 {
 portOptions.Protocols = HttpProtocols.Http1AndHttp2;
 });
});
上面倆個配置完成以後我們修改我們的Dockerfile,由於微軟提供的預設的映像是不提供
libmsquic
,所以我們需要自己寫一個Dockerfile,開啟我們Gateway計畫中的Dockerfile,並且添加
libmsquic
的構建流程
FROM mcr.microsoft.com/dotnet/aspnet:8.0.1-bookworm-slim-amd64 AS base
USER root
RUN apt update \
 && apt-get install -y --no-install-recommends curl \
 && curl -sSL -O https://packages.microsoft.com/config/debian/12/packages-microsoft-prod.deb \
 && dpkg -i packages-microsoft-prod.deb \
 && rm packages-microsoft-prod.deb \
 && apt-get update \
 && apt-get install -y libmsquic \
 && apt-get purge -y --auto-remove wget && apt-get clean && rm -rf /var/lib/apt/lists/*
WORKDIR /app
EXPOSE8080
EXPOSE8081
FROM mcr.microsoft.com/dotnet/sdk:8.0 AS build
ARG BUILD_CONFIGURATION=Release
WORKDIR /src
COPY ["src/Gateway/Gateway.csproj", "src/Gateway/"]
RUN dotnet restore "./src/Gateway/Gateway.csproj"
COPY . .
WORKDIR"/src/src/Gateway"
RUN dotnet build "./Gateway.csproj" -c $BUILD_CONFIGURATION -o /app/build
FROM build AS publish
ARG BUILD_CONFIGURATION=Release
RUN dotnet publish "./Gateway.csproj" -c $BUILD_CONFIGURATION -o /app/publish /p:UseAppHost=false
FROM base AS final
WORKDIR /app
COPY --from=publish /app/publish .
ENTRYPOINT ["dotnet", "Gateway.dll"]
在構建映像的時候需要使用root許可權,否則可能導致許可權不足構建失敗,上面完成了我們原生的映像構建和.NET Core的
HTTP3
的啟用,然後需要我們構建好了映像就可以在伺服器中跑一個容器了,在執行容器的時候還會有一個坑,下面我們來慢慢講解,
部署服務
開啟我們的伺服器使用Linux伺服器開啟,下面是我們的Gateway的一個Compose版本,由於Docker埠監聽預設使用的是tcp,所以我們需要監聽倆個協定,因為HTTP3是基於UDP實作的,這也是坑之一,還有如果登入失敗可能是對映目錄許可權不夠建立
Sqlite
檔失敗導致。
services:
gateway-api:
image:registry.token-ai.cn:8300/gateway
restart:always
environment:
USER:root
PASS:Aa010426.
ports:
-8080:8080
-8081:8081/udp
-8081:8081/tcp
volumes:
-./data:/data/
gateway-web:
image:registry.cn-shenzhen.aliyuncs.com/tokengo/gateway-web
restart:always
privileged:true
environment:
api_url:http://這裏是你上面的Gateway-api能在瀏覽器本地請求的地址:8200/
ports:
-1000:80
然後指向我們的
sudo docker-compose up -d
指向完成以後我們開啟我們的gateway-web的界面,並且登入進去,如果你沒有設定環境變量的話預設密碼是
root
:
Aa010426.
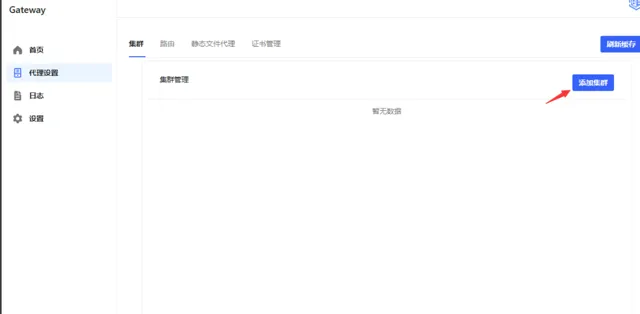
開啟我們的代理設定,添加一個集群:

開啟路由,點選添加路由,

開啟證書管理,點選添加證書:

將我們的證書上傳以後點選右上角的清除快取,則會生效,還需要註意將我們的網域名稱解析到伺服器當中。上面我們用的是
gitea.token-ai.cn
,註意的是自簽證書似乎不能使用。上面操作完成以後點選我們右上角的清除快取,然後存取我們的
https://gitea.token-ai.cn:8081
,然後開啟瀏覽器的F12,我們可以看到我們的,我們的協定除了第一個都是h3協定,這是因為第一個請求是不確定你是否支持h3所以發起一個h1或h2的協定然後,如果你的響應頭響應了
Alt-Svc
則會下次請求使用h3,

還需要註意的是,
Alt-Svc:h3=":8081"; ma=86400
的8081是前端存取的埠,這個是需要和存取埠一致,如果不一致也不會使用h3。
註意事項
某些瀏覽器不一定支持所以需要先確認瀏覽器是否開啟QUIC
還需要確認伺服器防火墻是否開啟UDP
然後根據上面的文件一步一步來即可,或者可以加群詢問群主。
結尾
來著token的分享
開源地址:
https://gitee.com/hejiale010426/Gateway https://github.com/239573049/Gateway
技術交流群:737776595


