作者:Teoan
链接:https://juejin.cn/post/7247810665241755703
# 背景
在使用XXL—JOB的实现定时任务过程中,有时候可能由于部署环境的要求,就只能用Spring自带的实现方式。
所以为了通用性和灵活性,突发奇想地看看能不能实现在不修改原本Spring定时任务代码的前提下,通过配置灵活控制定时任务具体的实现,同时任务的日志的管理也要同步进行切换。
# 分析并列出需要解决的问题思路
根据需求背景可以初步分析实现的大致方向和实现流程。实现的思路其实不复杂,重点在于如何具体去实现落地。

# 具体实现
判断是否启用XXl-JOB的实现方式
和大多数第三方starter包一样,我们可以利用SpringBoot的自动装配,读取配置中的某个属性值,作为是否装配我们写的类。特别注意的是SpringBoot不同版本的配置方式有所不同。自动装配类如下:
/** * 自动装配类 * * @author Teoan * @since 2023/04/18 10:18 */@Configuration@ConditionalOnProperty(name = "xxl.job.enable",havingValue = "true")@ComponentScan("com.teoan.job.auto.core")public classXxlJobAutoConfiguration{}
这里我们根据xxl.job.enable 的值,决定是否启用XXl-JOB的实现方式,如果xxl.job.enable 为false,则就什么都不装配不修改实现方式,默认就是Spring自带的实现方式。
扫描并读取注解值
熟悉SpringBoot的的朋友都应该知道,SpringBoot启动的时候,会去扫描目标注解,然后去做对应的初始化操作,比如@Service,@Component就是使被扫描到并将对应的类注入到Spring容器中。所以我们可以按照相同的思路,可以在应用启动就绪之后,扫描@Scheduled注解,对其进行对应的操作。
Spring中的@EventListener注解
Spring中使用**@EventListener标记某个方法为应用监听事件的处理逻辑,还能配合异步注解@Async实现异步触发,@EventListener通过传值的方式设置需要被监听的事件类型,比如应用启动时、应用就绪时、启动失败时等,具体有哪些监听的事件,可以参考Spring源码包
org.springframework.boot.context.event**。现在,我们可以利用Spring提供的监听注解,在应用启动就绪后,扫描对应注解,去实现我们的代码逻辑,同时为了不影响程序的正常启动速度,使用异步执行的方式。伪代码如下:
@Component@Slf4jpublic classJobAutoRegister{@EventListener(ApplicationReadyEvent. class)@AsyncpublicvoidonApplicationEvent(ApplicationReadyEvent event){// 执行扫描注解,自动注册xxl-job任务逻辑 }}
想学编程的同学,可以关注一下这个网站,上面的内容很全哦
网站地址:https://www.j301.cn
扫描并获取被@Scheduled标记的方法和对象
我们知道,使用@Scheduled注解对应的对象,必须是被Spring所托管的类,定时任务才会生效,所以我们可以扫描被@Component标记的类,再定位@Scheduled注解,获取对应的值、对象、方法等信息。伪代码如下:
private void addJobInfo() {List<Object> beanList = applicationContext.getBeansWithAnnotation(Component. class).values().stream().toList(); beanList.forEach(bean -> { Map<Method, Scheduled> annotatedMethods = MethodIntrospector.selectMethods(bean.get class(), (MethodIntrospector.MetadataLookup<Scheduled>) method -> AnnotatedElementUtils.findMergedAnnotation(method, Scheduled. class)); annotatedMethods.forEach((k, v) -> {// 停止Spring自带的定时任务// 自动注册到xxl-job任务 // 注册xxl-job的任务 }); }); }
关闭Spring自带的定时任务
ScheduledAnnotationBeanPostProcessor类是一个Spring框架的类,用于处理@Scheduled注解,实现定时任务的功能。我们可以通过这个类,对Spring中的定时任务进行一定的操作。通过阅读Spring源码,发现ScheduledAnnotationBeanPostProcessor有这么一个方法
postProcessBeforeDestruction, 该方法实现DestructionAwareBeanPostProcessor接口,用于销毁一个Bean的前置操作,而在ScheduledAnnotationBeanPostProcessor类中,这个方法的实现是取消某个Bean中的所有定时任务。具体可以看一下这个方法的源码。
@Overridepublicvoid postProcessBeforeDestruction(Object bean, String beanName) { Set<ScheduledTask> tasks; synchronized (this.scheduledTasks) { tasks = this.scheduledTasks.remove(bean); }if (tasks != null) {for (ScheduledTask task : tasks) { task.cancel(); } } }
由于我们上一步已经扫描获取到被@Scheduled注解标记过方法,我们可以直接通过方法对象,获取到对应的Bean,将Bean作为入参传入postProcessBeforeDestruction方法中,关闭Spring自带的定时任务。
/** * 停止Spring自带的定时注解 * * @param clazz 带有定时注解的类 */private void stopScheduled( class<?> clazz) { ScheduledAnnotationBeanPostProcessor processor = (ScheduledAnnotationBeanPostProcessor) applicationContext .getBean("org.springframework.context.annotation.internalScheduledAnnotationProcessor"); processor.postProcessBeforeDestruction(applicationContext.getBean(clazz), ""); }
# 读取注解信息并将任务自动注册到XXl-JOB
有使用过XXL-JOB的小伙伴都清楚,在使用方法模式时,除了使用注解标记定时任务的方法,还需要在调度中心上进行任务的配置,定时任务才会生效。目前我们已经获取到 @Scheduled 注解的信息,我们可以将 @Scheduled 所带的信息转换为对应XXL-JOB上对应的任务类型,在启动的时候自动地注册到调度中心,简化XXl-JOB任务调度的使用配置步骤。
注册JobHandler
翻看XXl-JOB中关于**@XxlJob的源码,发现会将@XxlJob**所标记的方法,向调度中心注册一个MethodJobHandler类型的JobHandler,表示方法模式对应的处理器。入口代码及位置如下
com.xxl.job.core.executor.impl.XxlJobSpringExecutor#initJobHandlerMethodRepository
protectedvoid registJobHandler(XxlJob xxlJob, Object bean, Method executeMethod){if (xxlJob == null) {return; }String name = xxlJob.value();//make and simplify the variables since they'll be called several times later class<?> clazz = bean.get class();String methodName = executeMethod.getName();if (name.trim().length() == 0) {thrownew RuntimeException("xxl-job method-jobhandler name invalid, for[" + clazz + "#" + methodName + "] ."); }if (loadJobHandler(name) != null) {thrownew RuntimeException("xxl-job jobhandler[" + name + "] naming conflicts."); }// execute method/*if (!(method.getParameterTypes().length == 1 && method.getParameterTypes()[0].isAssignableFrom(String. class))) { throw new RuntimeException("xxl-job method-jobhandler param- classtype invalid, for[" + bean.get class() + "#" + method.getName() + "] , " + "The correct method format like \" public ReturnT<String> execute(String param) \" ."); } if (!method.getReturnType().isAssignableFrom(ReturnT. class)) { throw new RuntimeException("xxl-job method-jobhandler return- classtype invalid, for[" + bean.get class() + "#" + method.getName() + "] , " + "The correct method format like \" public ReturnT<String> execute(String param) \" ."); }*/ executeMethod.setAccessible(true);// init and destroy Method initMethod = null; Method destroyMethod = null;if (xxlJob.init().trim().length() > 0) {try { initMethod = clazz.getDeclaredMethod(xxlJob.init()); initMethod.setAccessible(true); } catch (NoSuchMethodException e) {thrownew RuntimeException("xxl-job method-jobhandler initMethod invalid, for[" + clazz + "#" + methodName + "] ."); } }if (xxlJob.destroy().trim().length() > 0) {try { destroyMethod = clazz.getDeclaredMethod(xxlJob.destroy()); destroyMethod.setAccessible(true); } catch (NoSuchMethodException e) {thrownew RuntimeException("xxl-job method-jobhandler destroyMethod invalid, for[" + clazz + "#" + methodName + "] ."); } }// 核心方法 registJobHandler(name, new MethodJobHandler(bean, executeMethod, initMethod, destroyMethod)); }
我们可以参考源码,将被**@Scheduled标记的方法,以同样的方式,注册到调度中心中去。从而实现@XxlJob**同样的效果。
/** * 注册任务到xxl-job上 * * @param handlerName JobHandler名称 * @param executeMethod 执行定时任务的方法 */privatevoid registJobHandler(String handlerName, Method executeMethod) { executeMethod.setAccessible(true);// xxl-job初始化和销毁方法对象,后续有需要再赋值 Method initMethod = null; Method destroyMethod = null;//获取方法的Bean对象Object bean = applicationContext.getBean(executeMethod.getDeclaring class()); XxlJobExecutor.registJobHandler(handlerName, new MethodJobHandler(bean, executeMethod, initMethod, destroyMethod)); }
自动向调度中心注册执行器和对应的任务信息
注册执行器
XXL-JOB没有像PowerJob一样,提供类似powerjob-client的OpenAPI接口,但是问题不大,根据XXL-JOB的源码,我们可以自己实现一个,将获取token,添加执行器信息,添加任务信息等包装为service。具体代码可以查看文章后的github地址,这里简单贴出向调度中心注册执行器的代码。
public boolean autoRegisterGroup() { String url = adminAddresses + "/jobgroup/save"; HttpRequest httpRequest = HttpRequest.post(url) .form("appname", appName) .form("title", title); httpRequest.form("addressType", addressType);if (addressType.equals(1)) {if (Strings.isBlank(addressList)) {thrownew RuntimeException("手动录入模式下,执行器地址列表不能为空"); } httpRequest.form("addressList", addressList); } HttpResponse response = httpRequest.cookie(jobLoginService.getCookie()) .execute(); Object code = JSONUtil.parse(response.body()).getByPath("code");if(!code.equals(200)){ log.error(">>>>>>>>>>> xxl-job auto register group fail!msg[{}]",JSONUtil.parse(response.body()).getByPath("msg"));returnfalse; }returntrue; }
添加对应任务信息
同样的,添加任务信息的逻辑也包装为一个service。考虑到可能重复注册的问题,这里需要判断注册的任务是否已存在在调度中心中。
privatevoidaddJobInfo() { List<XxlJobGroup> jobGroups = jobGroupService.getJobGroup(); XxlJobGroup xxlJobGroup = jobGroups.get(0); List<Object> beanList = applicationContext.getBeansWithAnnotation(Component. class).values().stream().toList(); beanList.forEach(bean -> { Map<Method, Scheduled> annotatedMethods = MethodIntrospector.selectMethods(bean.get class(), (MethodIntrospector.MetadataLookup<Scheduled>) method -> AnnotatedElementUtils.findMergedAnnotation(method, Scheduled. class)); annotatedMethods.forEach((k, v) -> {// 停止Spring自带的定时任务 stopScheduled(k.getDeclaring class());// 自动注册到xxl-job 暂定Handle名称规则beanName#MethodName String handlerName = StringUtils.joinWith("#", k.getDeclaring class().getName(), k.getName());// 注册xxl-job的任务 registJobHandler(handlerName, k);//因为是模糊查询,需要再过滤一次 Optional<XxlJobInfo> first = jobInfoService.getJobInfo(xxlJobGroup.getId(), handlerName).stream() .filter(xxlJobInfo -> xxlJobInfo.getExecutorHandler().equals(handlerName)) .findFirst(); XxlJobInfo xxlJobInfo = createXxlJobInfo(xxlJobGroup, v, handlerName);if (first.isEmpty()) { Integer jobInfoId = jobInfoService.addJobInfo(xxlJobInfo);if (ObjectUtils.isNotEmpty(jobInfoId)) { log.info(">>>>>>>>>>> xxl-job auto add jobInfo success! JobInfoId[{}] JobInfo[{}]", jobInfoId, JSONUtil.toJsonStr(xxlJobInfo)); } } }); }); }
将定时任务中的log.info()日志输出一份到XXL-JOB的在线日志上
XXl-JOB中提供了XxlJobHelper类,用于将任务中的日志输出到调度中心,方便在调度中心上进行查看。而 lombok 生成的log.info()依赖于Slf4j日志门面。而我们知道,SpringBoot默认Slf4j的实现是Logback,Logback中提供类自定义Appender的接口,用于自定义日志信息的处理逻辑。我们可以在自定义的Appender中将日志打印到XXl-JOB中的调度中心。
/** * @author Teoan * @description 处理日志事件 * @since 2023/04/11 15:17 */@Componentpublic classXxlJobLogAppenderextendsAppenderBase<ILoggingEvent> {@Overrideprotectedvoidappend(ILoggingEvent iLoggingEvent){if (XxlJobHelper.getJobId() == -1) {return; }if (Level.ERROR.equals(iLoggingEvent.getLevel())) { ThrowableProxy throwableProxy = (ThrowableProxy) iLoggingEvent.getThrowableProxy();if (throwableProxy != null) { XxlJobHelper.log(throwableProxy.getThrowable()); } else { XxlJobHelper.log(iLoggingEvent.getMessage()); } } else { XxlJobHelper.log(iLoggingEvent.getMessage()); } }}
# 第三方应用集成Starter使用
为了让使用方更加方便的集成使用,减少其他依赖的配置,以上的实现封装为一个Starter,使用起来将非常的方便,具体的使用步骤如下。
在POM文件中引入Starter依赖
提供的Starter对XXL-JOB没有强依赖,所以使用方还得引入XXL-JOB的依赖
<!-- xxl-job-core --><dependency><groupId>com.xuxueli</groupId><artifactId>xxl-job-core</artifactId><version>${xxl-job.version}</version></dependency><dependency><groupId>com.teoan</groupId><artifactId>xxl-job-auto-spring-boot-starter</artifactId><version>${project.version}</version></dependency>
SpringBoor配置文件中添加XXL-JOB的配置
除了配置XXL-JOB的基本配置,还需要配置我们自定义实现功能所需要的配置项,具体如下:
server:port: 8080spring:application:name: xxlJobAutoxxl:job: # 自动注册自定义新增配置项 是否使用Xxl实现定时任务enable: trueaccessToken: admin:addresses: http://localhost:8080/xxl-job-admin # 以下admin配置为自动注册自定义新增配置项,必须项username: admin #admin 用户名password: password #admin 密码executor:appname: ${spring.application.name}ip: address:logpath: logretentiondays: 3port: 0 # 以下executor配置为自动注册自定义新增配置项,可选addressList: #在addressType为1的情况下,手动录入执行器地址列表,多地址逗号分隔addressType: 0 #执行器地址类型:0=自动注册、1=手动录入,默认为0title: ${spring.application.name} #执行器名称
XXL-JOB执行器组件配置
这个是XXL-JOB执行器所需要的配置。
@Configuration@Slf4jpublic classXxlJobConfig{@Value("${xxl.job.admin.addresses}")private String adminAddresses;@Value("${xxl.job.accessToken}")private String accessToken;@Value("${xxl.job.executor.appname}")private String appname;@Value("${xxl.job.executor.address}")private String address;@Value("${xxl.job.executor.ip}")private String ip;@Value("${xxl.job.executor.port}")private int port;@Value("${xxl.job.executor.logpath}")private String logPath;@Value("${xxl.job.executor.logretentiondays}")private int logRetentionDays;@Beanpublic XxlJobSpringExecutor xxlJobExecutor() { log.info(">>>>>>>>>>> xxl-job config init."); XxlJobSpringExecutor xxlJobSpringExecutor = new XxlJobSpringExecutor(); xxlJobSpringExecutor.setAdminAddresses(adminAddresses); xxlJobSpringExecutor.setAppname(appname); xxlJobSpringExecutor.setAddress(address); xxlJobSpringExecutor.setIp(ip); xxlJobSpringExecutor.setPort(port); xxlJobSpringExecutor.setAccessToken(accessToken); xxlJobSpringExecutor.setLogPath(logPath); xxlJobSpringExecutor.setLogRetentionDays(logRetentionDays);return xxlJobSpringExecutor; }}
使用SpringBoot自带的@Scheduled注解开发定时任务
新建一个Job类模拟使用定时任务的场景。
/** * @author Teoan * @since 2023/04/19 10:14 */@Slf4j@Componentpublic classXxlJobAutoSamplesJob{@Scheduled(fixedRate = 10000)publicvoidsamplesJob(){ log.info("samplesJob executor success!"); }}
启动项目验证
先将配置文件中的xxl.job.enable设置为false,使用Spring默认的实现方式。
. ____ _ __ _ _ /\\ / ___'_ __ _ _(_)_ __ __ _ \ \ \ \( ( )\___ | '_ | '_| | '_ \/ _` | \ \ \ \ \\/ ___)| |_)| | | | | || (_| | ) ) ) ) ' |____| .__|_| |_|_| |_\__, | / / / / =========|_|==============|___/=/_/_/_/ :: Spring Boot :: (v3.0.5)2023-05-07 15:46:19.633 [main] INFO com.teoan.job.auto.samples.XxlJobAutoApplication - Starting XxlJobAutoApplication using Java 17.0.6 with PID 28253 (/Users/teoan/Project/xxl-job-auto/xxl-job-auto-spring-boot-samples/target/ classes started by teoan in /Users/teoan/Project/xxl-job-auto)2023-05-0715:46:19.645 [main] INFO com.teoan.job.auto.samples.XxlJobAutoApplication - No active profile set, falling back to1default profile: "default"2023-05-0715:46:21.083 [main] INFO o.s.boot.web.embedded.tomcat.TomcatWebServer - Tomcat initializedwith port(s): 8080 (http)2023-05-0715:46:21.091 [main] INFO org.apache.coyote.http11.Http11NioProtocol - Initializing ProtocolHandler ["http-nio-8080"]2023-05-0715:46:21.092 [main] INFO org.apache.catalina.core.StandardService - Starting service [Tomcat]2023-05-0715:46:21.092 [main] INFO org.apache.catalina.core.StandardEngine - Starting Servlet engine: [Apache Tomcat/10.1.7]2023-05-0715:46:21.179 [main] INFO o.a.c.core.ContainerBase.[Tomcat].[localhost].[/] - Initializing Spring embedded WebApplicationContext2023-05-0715:46:21.179 [main] INFO o.s.b.w.s.c.ServletWebServerApplicationContext - Root WebApplicationContext: initialization completed in1295 ms2023-05-0715:46:21.367 [main] INFO com.teoan.job.auto.samples.config.XxlJobConfig - >>>>>>>>>>> xxl-job config init.2023-05-0715:46:21.797 [main] INFO o.s.b.actuate.endpoint.web.EndpointLinksResolver - Exposing 1 endpoint(s) beneath base path'/actuator'2023-05-0715:46:21.954 [main] INFO org.apache.coyote.http11.Http11NioProtocol - Starting ProtocolHandler ["http-nio-8080"]2023-05-0715:46:21.969 [main] INFO o.s.boot.web.embedded.tomcat.TomcatWebServer - Tomcat started on port(s): 8080 (http) withcontextpath''2023-05-0715:46:21.998 [scheduling-1] INFO c.teoan.job.auto.samples.job.XxlJobAutoSamplesJob - samplesJob executor success!2023-05-0715:46:22.000 [main] INFO com.teoan.job.auto.samples.XxlJobAutoApplication - Started XxlJobAutoApplication in3.014seconds (process running for3.887)2023-05-0715:46:22.020 [Thread-4] INFO com.xxl.job.core.server.EmbedServer - >>>>>>>>>>> xxl-job remoting serverstartsuccess, nettype = class com.xxl.job.core.server.EmbedServer, port = 99992023-05-0715:46:22.397 [RMI TCP Connection(2)-192.168.123.139] INFO o.a.c.core.ContainerBase.[Tomcat].[localhost].[/] - Initializing Spring DispatcherServlet 'dispatcherServlet'2023-05-0715:46:22.399 [RMI TCP Connection(2)-192.168.123.139] INFO org.springframework.web.servlet.DispatcherServlet - Initializing Servlet 'dispatcherServlet'2023-05-0715:46:22.402 [RMI TCP Connection(2)-192.168.123.139] INFO org.springframework.web.servlet.DispatcherServlet - Completed initialization in3 ms2023-05-0715:47:31.997 [scheduling-1] INFO c.teoan.job.auto.samples.job.XxlJobAutoSamplesJob - samplesJob executor success!2023-05-0715:47:41.997 [scheduling-1] INFO c.teoan.job.auto.samples.job.XxlJobAutoSamplesJob - samplesJob executor success!2023-05-0715:47:51.996 [scheduling-1] INFO c.teoan.job.auto.samples.job.XxlJobAutoSamplesJob - samplesJob executor success!2023-05-0715:48:01.994 [scheduling-1] INFO c.teoan.job.auto.samples.job.XxlJobAutoSamplesJob - samplesJob executor success!
嗯,没啥毛病。scheduling-1 用的啥Spring自带的scheduling线程池去执行定时任务。接下来将配置文件中的xxl.job.enable设置为true,再看看日志。
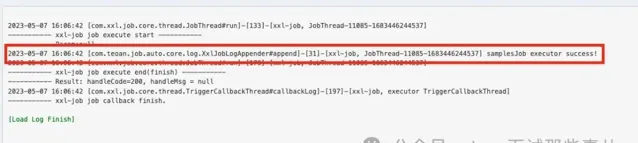
. ____ _ __ _ _ /\\ / ___'_ __ _ _(_)_ __ __ _ \ \ \ \( ( )\___ | '_ | '_| | '_ \/ _` | \ \ \ \ \\/ ___)| |_)| | | | | || (_| | ) ) ) ) ' |____| .__|_| |_|_| |_\__, | / / / / =========|_|==============|___/=/_/_/_/ :: Spring Boot :: (v3.0.5)2023-05-07 15:56:50.011 [main] INFO com.teoan.job.auto.samples.XxlJobAutoApplication - Starting XxlJobAutoApplication using Java 17.0.6 with PID 30937 (/Users/teoan/Project/xxl-job-auto/xxl-job-auto-spring-boot-samples/target/ classes started by teoan in /Users/teoan/Project/xxl-job-auto)2023-05-0715:56:50.025 [main] INFO com.teoan.job.auto.samples.XxlJobAutoApplication - No active profile set, falling back to1default profile: "default"2023-05-0715:56:51.538 [main] INFO o.s.boot.web.embedded.tomcat.TomcatWebServer - Tomcat initializedwith port(s): 8080 (http)2023-05-0715:56:51.548 [main] INFO org.apache.coyote.http11.Http11NioProtocol - Initializing ProtocolHandler ["http-nio-8080"]2023-05-0715:56:51.549 [main] INFO org.apache.catalina.core.StandardService - Starting service [Tomcat]2023-05-0715:56:51.549 [main] INFO org.apache.catalina.core.StandardEngine - Starting Servlet engine: [Apache Tomcat/10.1.7]2023-05-0715:56:51.642 [main] INFO o.a.c.core.ContainerBase.[Tomcat].[localhost].[/] - Initializing Spring embedded WebApplicationContext2023-05-0715:56:51.642 [main] INFO o.s.b.w.s.c.ServletWebServerApplicationContext - Root WebApplicationContext: initialization completed in1351 ms2023-05-0715:56:51.835 [main] INFO com.teoan.job.auto.samples.config.XxlJobConfig - >>>>>>>>>>> xxl-job config init.2023-05-0715:56:52.282 [main] INFO o.s.b.actuate.endpoint.web.EndpointLinksResolver - Exposing 1 endpoint(s) beneath base path'/actuator'2023-05-0715:56:52.444 [main] INFO org.apache.coyote.http11.Http11NioProtocol - Starting ProtocolHandler ["http-nio-8080"]2023-05-0715:56:52.457 [main] INFO o.s.boot.web.embedded.tomcat.TomcatWebServer - Tomcat started on port(s): 8080 (http) withcontextpath''2023-05-0715:56:52.477 [scheduling-1] INFO c.teoan.job.auto.samples.job.XxlJobAutoSamplesJob - samplesJob executor success!2023-05-0715:56:52.480 [main] INFO com.teoan.job.auto.samples.XxlJobAutoApplication - Started XxlJobAutoApplication in3.118seconds (process running for3.86)2023-05-0715:56:52.515 [Thread-4] INFO com.xxl.job.core.server.EmbedServer - >>>>>>>>>>> xxl-job remoting serverstartsuccess, nettype = class com.xxl.job.core.server.EmbedServer, port = 99992023-05-0715:56:52.712 [RMI TCP Connection(3)-192.168.123.139] INFO o.a.c.core.ContainerBase.[Tomcat].[localhost].[/] - Initializing Spring DispatcherServlet 'dispatcherServlet'2023-05-0715:56:52.714 [RMI TCP Connection(3)-192.168.123.139] INFO org.springframework.web.servlet.DispatcherServlet - Initializing Servlet 'dispatcherServlet'2023-05-0715:56:52.715 [RMI TCP Connection(3)-192.168.123.139] INFO org.springframework.web.servlet.DispatcherServlet - Completed initialization in1 ms2023-05-0715:56:53.145 [main] INFO com.teoan.job.auto.core.JobAutoRegister - >>>>>>>>>>> xxl-job autoregistergroupsuccess!2023-05-0715:56:53.490 [main] INFO com.xxl.job.core.executor.XxlJobExecutor - >>>>>>>>>>> xxl-job register jobhandler success, name:com.teoan.job.auto.samples.job.XxlJobAutoSamplesJob#samplesJob, jobHandler:com.xxl.job.core.handler.impl.MethodJobHandler@223cbf0d[ class com.teoan.job.auto.samples.job.XxlJobAutoSamplesJob#samplesJob]2023-05-0715:56:53.647 [main] INFO com.teoan.job.auto.core.JobAutoRegister - >>>>>>>>>>> xxl-job autoadd jobInfo success! JobInfoId[11085] JobInfo[{"id":0,"jobGroup":2080,"jobDesc":"com.teoan.job.auto.samples.job.XxlJobAutoSamplesJob#samplesJob","author":"JobAutoRegister","scheduleType":"FIX_RATE","scheduleConf":"10","misfireStrategy":"DO_NOTHING","executorRouteStrategy":"FIRST","executorHandler":"com.teoan.job.auto.samples.job.XxlJobAutoSamplesJob#samplesJob","executorBlockStrategy":"SERIAL_EXECUTION","executorTimeout":0,"executorFailRetryCount":0,"glueType":"BEAN","glueRemark":"GLUE代码初始化","triggerStatus":1,"triggerLastTime":0,"triggerNextTime":0}]2023-05-0715:56:53.650 [main] INFO com.teoan.job.auto.core.JobAutoRegister - >>>>>>>>>>> xxl-job autoregistersuccess2023-05-0715:57:24.538 [xxl-job, EmbedServer bizThreadPool-123827075] INFO com.xxl.job.core.executor.XxlJobExecutor - >>>>>>>>>>> xxl-job regist JobThread success, jobId:11085, handler:com.xxl.job.core.handler.impl.MethodJobHandler@223cbf0d[ class com.teoan.job.auto.samples.job.XxlJobAutoSamplesJob#samplesJob]2023-05-0715:57:24.540 [xxl-job, JobThread-11085-1683446244537] INFO c.teoan.job.auto.samples.job.XxlJobAutoSamplesJob - samplesJob executor success!
日志看起来没啥问题,注册执行器和注册任务信息的相关日志都打印了出来,定时任务的执行日志也有了。
我们上调度中心看看。

嗯,符合预期,执行器和任务详情都自动添加到调度中心了,任务中心的日志也能在调度中心中查看了。
# 实现过程中思考的几个问题
是否实现任务信息的更新
一开始想着是否需要监听注解上值的变化,对应地去更新XXL-JOB上的任务信息,如经常需要改变的定时任务的间隙时间或者corn表达式,后来还是决定不实现了,考虑到大多数场景下,自动注册任务只是作为应用启动的初始化工作,后续需要调整还是得上调度中心进行操作,所以任务的配置就不能一直以注解上配置为准了。
是否采用修改数据库数据的方式实现任务的注册
自动注册任务和执行器信息,其实可以直接利用ORM操作数据库去实现。不过如果XXL-JOB的数据库和当前应用不在同一台机器上,就需要配置多个数据源了,相对比较麻烦,对于第三方使用者来说,也会多出一些配置。总体看起来不够优雅,最后还是采用读取调度中心地址,利用http工具调用API的方式去实现。
是否在自动装配类上加上@Scheduled
在提供的自动装配类中,其实可以帮使用者默认加上 @Scheduled 开启SpringBoot的自动任务,但是为了尽量不影响正常的开发配置,开头说到的尽量让用户无感知,所以这个 @Scheduled 还是需要starter的使用方自己去配置,然后走默认实现的定时任务开发。
提供的Starter是否加上XXL-Job的依赖
提供的strarter包只是作为增强功能的存在,所以是可选的,不应该耦合XXL-JOB的核心依赖,就像Hutool中POI工具一样,本身并不依赖POI的核心依赖,作为Strarter包,应该只提供自己的核心功能就行。
# 总结
第一次根据自己的突发奇想,对中间件进行二次开发,了解了XXL-JOB的具体实现的过程中,也间接锻炼了自己阅读开源代码的能力。
# 项目地址
https://github.com/Teoan/xxl-job-auto
想学编程的同学,可以关注一下这个网站,上面的内容很全哦
网站地址:https://www.j301.cn
热门推荐


