在我們平時做計畫的時候,經常會遇到復雜的業務邏輯,如果使用if else來實作的話,往往會很冗長,維護成本也很高。今天給大家推薦一個輕量級流程引擎
LiteFlow
,可以優雅地實作復雜的業務邏輯,本文將以電商計畫中的訂單價格計算為例來聊聊它的使用。
LiteFlow簡介
LiteFlow是一個輕量且強大的國產流程引擎框架,可用於復雜的元件化業務的編排工作。透過它我們可以把業務邏輯都定義到不同元件之中,然後使用簡潔的規則檔來串聯整個流程,從而實作復雜的業務邏輯。
LiteFlow主要特性如下:
元件定義統一:所有的邏輯都是元件,直接使用Spring原生註解
@Component
定義即可。
規則輕量:基於規則檔來編排流程,學習規則運算式入門僅需5分鐘。
規則多樣化:規則支持xml、json、yml三種規則檔寫法,喜歡哪種用哪個。
任意編排:同步異步混編,再復雜的邏輯過程,都能輕易實作。
規則能從任意地方載入:框架中提供本地檔配置源和zk配置源的實作,也提供了擴充套件介面。
優雅熱重新整理機制:規則變化,無需重新開機套用,即時改變套用的規則。
支持廣泛:同事支持SpringBoot,Spring或其他Java計畫。
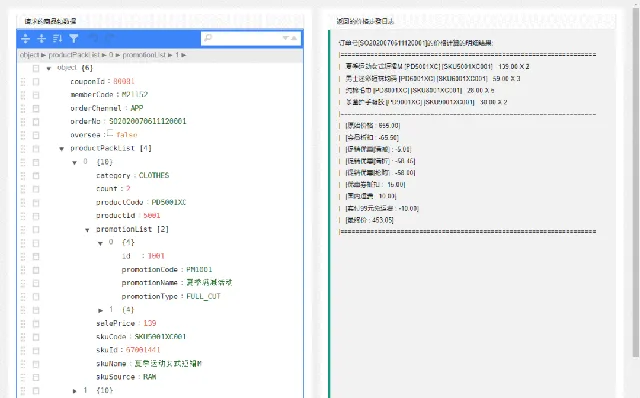
下面是使用LiteFlow來實作訂單價格計算的展示頁面,實作起來確實比較優雅!
IDEA外掛程式
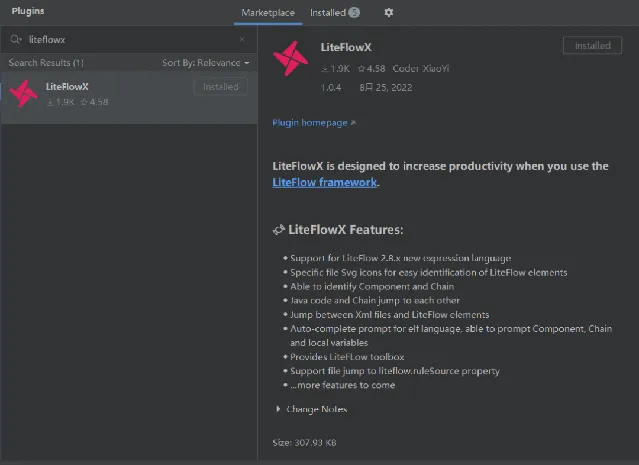
LiteFlow還擁有自己的IDEA外掛程式
LiteFlowX
,透過該外掛程式能支持規則檔的智慧提示、語法高亮、元件與規則檔之間的跳轉及LiteFlow工具箱等功能,強烈建議大家安裝下。
首先我們在IDEA的外掛程式市場中安裝該外掛程式;
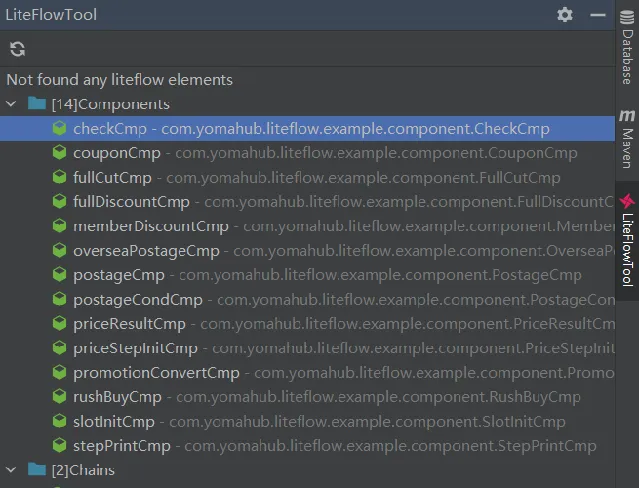
安裝好LiteFlowX外掛程式後,我們程式碼中所定義的元件和規則檔都會顯示特定的圖示;

當我們編輯規則檔時,會提示我們已經定義好的元件,並支持從規則檔中跳轉到元件;

還支持從右側開啟工具箱,快捷檢視元件和規則檔。
規則運算式
接下來我們學習下規則運算式,也就是規則檔的編寫,入門運算式非常簡單,但這對使用LiteFlow非常有幫助!
序列編排
當我們想要依次執行a、b、c、d四個元件時,直接使用
THEN
關鍵字即可。
<chainname="chain1">
 THEN(a, b, c, d);
</chain>
並列編排
如果想並列執行a、b、c三個元件的話,可以使用
WHEN
關鍵字。
<chainname="chain1">
 WHEN(a, b, c);
</chain>
選擇編排
如果想實作程式碼中的switch邏輯的話,例如透過a元件的返回結果進行判斷,如果返回的是元件名稱b的話則執行b元件,可以使用
SWITCH
關鍵字。
<chainname="chain1">
 SWITCH(a).to(b, c, d);
</chain>
條件編排
如果想實作程式碼中的if邏輯的話,例如當x元件返回為true時執行a,可以使用
IF
關鍵字。
<chainname="chain1">
 IF(x, a);
</chain>
如果想實作if的三元運算子邏輯的話,例如x元件返回為true時執行a元件,返回為false時執行b元件,可以編寫如下規則檔。
<chainname="chain1">
 IF(x, a, b);
</chain>
如果想實作if else邏輯的話,可以使用
ELSE
關鍵字,和上面實作效果等價。
<chainname="chain1">
 IF(x, a).ELSE(b);
</chain>
如果想實作else if邏輯的話,可以使用
ELIF
關鍵字。
<chainname="chain1">
 IF(x1, a).ELIF(x2, b).ELSE(c);
</chain>
使用子流程
當某些流程比較復雜時,我們可以定義子流程,然後在主流程中參照,這樣邏輯會比較清晰。
例如我們有如下子流程,執行C、D元件。
<chainname="subChain">
 THEN(C, D);
</chain>
然後我們直接在主流程中參照子流程即可。
<chainname="mainChain">
 THEN(
 A, B,
 subChain,
 E
 );
</chain>
使用
學習完規則運算式後,我們發現LiteFlow寥寥幾個關鍵字,就可以實作復雜的流程了。下面我們將以訂單價格計算為例,實踐下LiteFlow這個流程引擎框架。
首先我們需要在計畫中整合LiteFlow,這裏以SpringBoot套用為例,在
pom.xml
中添加如下依賴即可;
<dependency>
<groupId>com.yomahub</groupId>
<artifactId>liteflow-spring-boot-starter</artifactId>
<version>2.8.5</version>
</dependency>
接下來修改配置檔
application.yml
,配置好LiteFlow的規則檔路徑即可;
server:
port:8580
liteflow:
#規則檔路徑
rule-source:liteflow/*.el.xml
這裏直接使用LiteFlow官方的Demo,該案例為一個價格計算引擎,模擬了電商中對訂單價格的計算,並提供了簡單的界面,下載地址如下:
https://gitee.com/bryan31/liteflow-example
下載完成後,直接執行Demo,透過如下地址可以存取測試頁面:http://localhost:8580
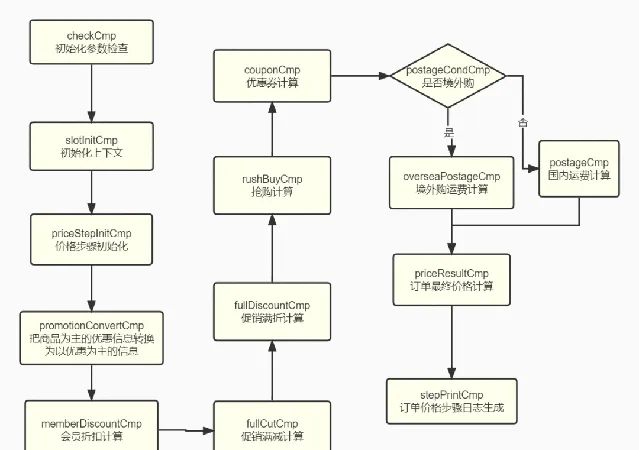
這個案例透過傳入的訂單數據,能計算出訂單的最終價格,這裏涉及到會員折扣、促銷優惠、優惠券抵扣、運費計算等操作,多達十幾步,如果不使用流程引擎的話實作起來是非常復雜的,下面是訂單價格計算中各元件執行流程圖;
接下來我們來聊聊如何使用LiteFlow來實作這個功能,首先我們需要定義好各個元件,普通元件需要繼承
NodeComponent
並實作
process()
方法,比如這裏的優惠券抵扣元件,還需設定
@Component
註解的名稱,可以透過重寫
isAccess
方法來決定是否執行該元件;
/**
 * 優惠券抵扣計算元件
 */
@Component("couponCmp")
public classCouponCmpextendsNodeComponent{
@Override
publicvoidprocess()throws Exception {
 PriceContext context = this.getContextBean(PriceContext. class);
/**這裏Mock下根據couponId取到的優惠卷面值為15元**/
 Long couponId = context.getCouponId();
 BigDecimal couponPrice = new BigDecimal(15);
 BigDecimal prePrice = context.getLastestPriceStep().getCurrPrice();
 BigDecimal currPrice = prePrice.subtract(couponPrice);
 context.addPriceStep(new PriceStepVO(PriceTypeEnum.COUPON_DISCOUNT,
 couponId.toString(),
 prePrice,
 currPrice.subtract(prePrice),
 currPrice,
 PriceTypeEnum.COUPON_DISCOUNT.getName()));
 }
@Override
publicbooleanisAccess(){
 PriceContext context = this.getContextBean(PriceContext. class);
if(context.getCouponId() != null){
returntrue;
 }else{
returnfalse;
 }
 }
}
還有一些比較特殊的元件,比如用於判斷是按國內運費計算規則來計算還是境外規則的條件元件,需要繼承
NodeSwitchComponent
並實作
processSwitch()
方法;
/**
 * 運費條件元件
 */
@Component("postageCondCmp")
public classPostageCondCmpextendsNodeSwitchComponent{
@Override
public String processSwitch()throws Exception {
 PriceContext context = this.getContextBean(PriceContext. class);
//根據參數oversea來判斷是否境外購,轉到相應的元件
boolean oversea = context.isOversea();
if(oversea){
return"overseaPostageCmp";
 }else{
return"postageCmp";
 }
 }
}
其他元件邏輯具體可以參考demo源碼,定義好元件之後就可以透過規則檔將所有流程連線起來了,首先是促銷優惠計算子流程;
<?xml version="1.0" encoding="UTF-8"?>
<flow>
<chainname="promotionChain">
 THEN(fullCutCmp, fullDiscountCmp, rushBuyCmp);
</chain>
</flow>
然後是整個流程,大家可以對比下上面的流程圖,基本能畫出流程圖的都可以用LiteFlow來實作;
<?xml version="1.0" encoding="UTF-8"?>
<flow>
<chainname="mainChain">
 THEN(
 checkCmp, slotInitCmp, priceStepInitCmp,
 promotionConvertCmp, memberDiscountCmp,
 promotionChain, couponCmp,
 SWITCH(postageCondCmp).to(postageCmp, overseaPostageCmp),
 priceResultCmp, stepPrintCmp
 );
</chain>
</flow>
最後在Controller中添加介面,獲取傳入的訂單數據,然後呼叫
FlowExecutor
類的執行方法即可;
@Controller
public classPriceExampleController{
@Resource
private FlowExecutor flowExecutor;
@RequestMapping(value = "/submit", method = RequestMethod.POST)
@ResponseBody
public String submit(@Nullable @RequestBody String reqData){
try {
 PriceCalcReqVO req = JSON.parseObject(reqData, PriceCalcReqVO. class);
 LiteflowResponse response = flowExecutor.execute2Resp("mainChain", req, PriceContext. class);
return response.getContextBean(PriceContext. class).getPrintLog();
 } catch (Throwable t) {
 t.printStackTrace();
return"error";
 }
 }
}
我們平時在寫復雜程式碼時,後面一步經常會用到前面一步的結果,然而使用LiteFlow之後,元件裏並沒有參數傳遞,那麽各個流程中參數是這麽處理的?其實是LiteFlow中有個上下文的概念,流程中的所有數據都統一存放在此,比如上面的
PriceContext
類;
public classPriceContext{
/**
 * 訂單號
 */
private String orderNo;
/**
 * 是否境外購
 */
privateboolean oversea;
/**
 * 商品包
 */
private List<ProductPackVO> productPackList;
/**
 * 訂單渠道
 */
private OrderChannelEnum orderChannel;
/**
 * 會員CODE
 */
private String memberCode;
/**
 * 優惠券
 */
private Long couponId;
/**
 * 優惠資訊
 */
private List<PromotionPackVO> promotionPackList;
/**
 * 價格步驟
 */
private List<PriceStepVO> priceStepList = new ArrayList<>();
/**
 * 訂單原始價格
 */
private BigDecimal originalOrderPrice;
/**
 * 訂單最終價格
 */
private BigDecimal finalOrderPrice;
/**
 * 步驟日誌
 */
private String printLog;
}
在初始化上下文的
slotInitCmp
元件中,我們早已從
getRequestData()
方法中獲取到了請求的訂單參數,然後設定到了
PriceContext
上下文中,流程中的其他參數和結果也儲存在此了。
/**
 * Slot初始化元件
 */
@Component("slotInitCmp")
public classSlotInitCmpextendsNodeComponent{
@Override
publicvoidprocess()throws Exception {
//把主要參數冗余到slot裏
 PriceCalcReqVO req = this.getRequestData();
 PriceContext context = this.getContextBean(PriceContext. class);
 context.setOrderNo(req.getOrderNo());
 context.setOversea(req.isOversea());
 context.setMemberCode(req.getMemberCode());
 context.setOrderChannel(req.getOrderChannel());
 context.setProductPackList(req.getProductPackList());
 context.setCouponId(req.getCouponId());
 }
@Override
publicbooleanisAccess(){
 PriceCalcReqVO req = this.getSlot().getRequestData();
if(req != null){
returntrue;
 }else{
returnfalse;
 }
 }
}
總結
LiteFlow確實是一款好用的輕量級流程引擎,可以讓復雜的業務邏輯變得清晰起來,便於程式碼維護。它的規則檔比起其他流程引擎來說,編寫簡單太多了,幾分鐘就能上手,感興趣的朋友可以嘗試下它!
參考資料
官網文件:https://liteflow.cc/
計畫源碼地址
https://gitee.com/dromara/liteFlow
👇🏻 點選下方閱讀原文,獲取魚皮往期編程幹貨。
往期推薦


