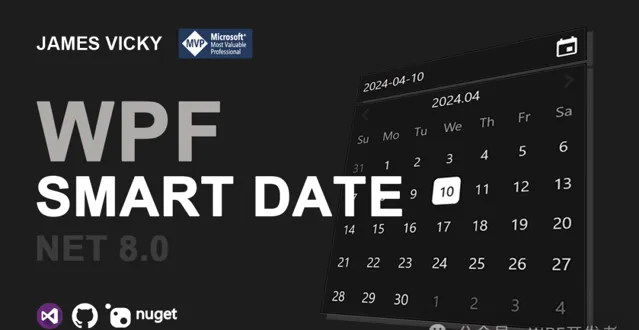
實作現代化 WPF 日期選擇控制項 SmartDate
控制項名稱:SmartDate
作者:WPFDevelopersOrg - Vicky&James
源碼連結 [1] :https://github.com/vickyqu115/smartdate
教學視訊 [2] (【小李趣味多】https://bit.ly/3xI9DNh)
這篇文章是對
WPF SmartDate
教程視訊的技術回顧。

WPF DatePicker 的問題認知
WPF DatePicker
是
WPF
中歷史悠久的基本控制項之一,已經有近
20
年的歷史。相比簡單的
Button、TextBox、CheckBox
等控制項,
DatePicker
內部結構和操作步驟更加復雜,由多個控制項組成。因此,進行自訂需要高水平的技能和技術,直接使用或自訂這一老舊控制項相當困難。
WPF DatePicker 的理解
分析和理解
DatePicker
的結構及樣版中各內部元素的互動,是提升
WPF
設計和分析能力的有益案例。這不僅適用於
DatePicker
,還適用於所有
WPF
控制項。然而,
DatePicker
的設計是在很多年前,與現在更加推薦的編程方式有所不同,因此在這樣的環境下,根據計畫的具體需求,透過
CustomControl
重新構建一個
DatePicker
控制項可能是更加有效的方式。
下載和準備源碼
本文介紹了如何辨識基礎
DatePicker
的使用問題,並透過
CustomControl
方法重新設計。你可以透過
GitHub
下載源碼並檢視結果,同時結合本文閱讀將會更有幫助。
首先,透過以下命令從
GitHub
下載源碼:
git clone https://github.com/vickyqu115/smartdate
接下來,要執行源碼的解決方案檔,需要在
Windows 10
以上的環境中使用
Visual Studio 2022
或
Rider
以及
.NET 8.0
版本。
SmartDate.sln

計畫結構
SmartDate
由兩個計畫組成:
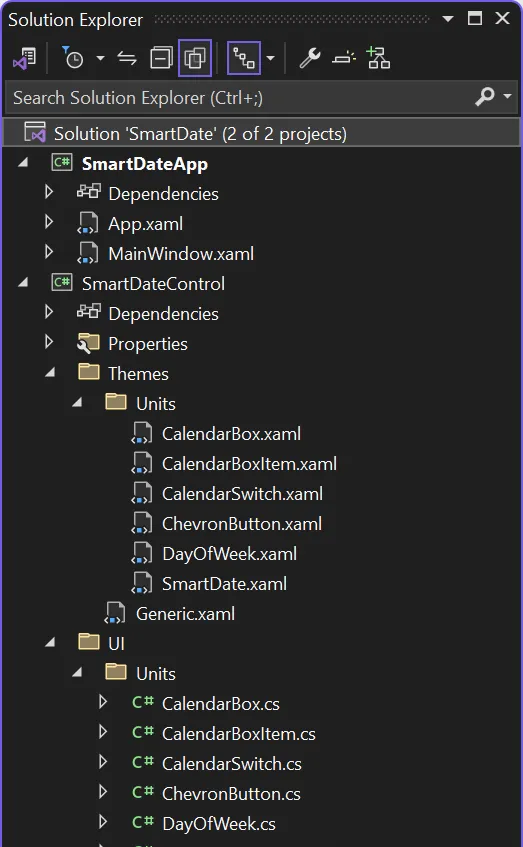
SmartDateControl
:
CustomControl
庫,包含
SmartDate
類及所有子
CustomControl
類。
SmartDateApp : 一個簡單的應用程式計畫,展示如何使用這個控制項。
SmartDate 的聲明與使用方法
使用方法非常簡單。透過
xmlns
聲明名稱空間,並像使用傳統
DatePicker
一樣使用
SmartDate
。
<Windowx: class="SmartDateApp.MainWindow"
xmlns="http://schemas.microsoft.com/winfx/2006/xaml/presentation"
xmlns:x="http://schemas.microsoft.com/winfx/2006/xaml"
xmlns:d="http://schemas.microsoft.com/expression/blend/2008"
xmlns:mc="http://schemas.openxmlformats.org/markup-compatibility/2006"
xmlns:smart="clr-namespace:SmartDateControl.UI.Units;assembly=SmartDateControl"
xmlns:theme="https://jamesnet.dev/xaml/presentation/themeswitch"
mc:Ignorable="d"
x:Name="Window"
Title="SmartDate"Height="450"Width="800"Background="#FFFFFF">
<ViewboxWidth="500">
<UniformGridMargin="20"Columns="1"VerticalAlignment="Top">
<smart:SmartDateSelectedDate="{Binding Created}"/>
<DatePickerSelectedDate="{Binding Created}"/>
</UniformGrid>
</Viewbox>
</Window>
SelectedDate
是一個
DependencyProperty
,與
DatePicker
的
SelectedDate
相同,型別為
DateTime?
。
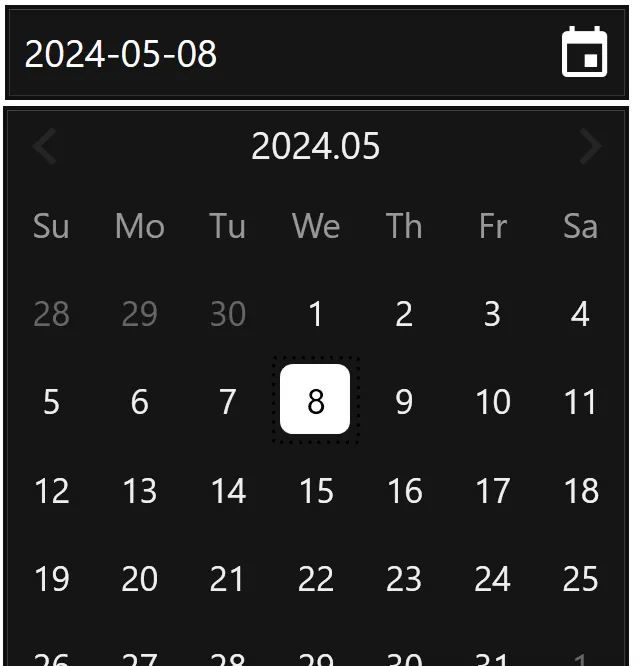
執行結果

CustomControl 的定義與套用
開始定義
CustomControl
。通常,
CustomControl
是從
Control
衍生的類,但實際上,所有從
DependencyObject
衍生的類都可以包括在內。然而,只有那些可以利用
Template
或至少可以利用
DataContext
的階層才有意義。因此,從
FrameworkElement
衍生的類更適合用於
CustomControl
的實作。
設計新的 DatePicker: SmartDate
本文詳細說明了如何實作一個從基本類
Control
衍生的新的
CustomControl
SmartDate
,而不是使用現有的
DatePicker
。
選擇 Control 而非 ContentControl 的原因
首先,了解
ContentControl
和
Control
的區別。
ContentControl
除了提供基本樣版外,還提供
Content
和
ContentTemplate
內容。
ContentPresenter
透過
DataTemplate
自動連線 Content 和 ContentTemplate,因此無需手動設定它們之間的關系。總結來說,根據
DataTemplate
的基本利用情況選擇衍生控制項是明智的。
DatePicker
是一個使用
DataTemplate
的控制項嗎?盡管觀點可能不同,但
DatePicker
這樣的復雜控制項通常需要多個
DataTemplate
,不適合被視為一般的
ContentControl
。實際上,
DatePicker
衍生自
Control
,而類似型別的控制項通常也繼承自
Control
。盡管
ComboBox
看起來與
DatePicker
相似,但它是一個擁有
ItemsSource
內容的
ItemsControl
。
因此,實作
SmartDate
時選擇
Control
是合適的,因為
SmartDate
並不提供獨立的
DataTemplate
。
DataTemplate 的套用方法
雖然
SmartDate
預設不提供
DataTemplate
,但在多個領域可以考慮擴充套件
DataTemplate
。
例如,可以擴充套件
DayOfWeek
控制項的
ContentPresenter
,以添加對特定日期的處理。客戶經常要求特殊日期的觸發器或轉換器,這樣的擴充套件非常實用。
將
SelectedDate
繫結區域擴充套件為
ContentPresenter
,可以靈活地用於簡單的
TextBlock
、可編輯的
TextBox
或包含時間選擇的日期選擇。
DataTemplate 的不足
盡管
DataTemplate
在復雜情況下保持通用性並提供必要的客製樣版區域,但在特定控制項如日期選擇器中套用時需要謹慎考慮。
DataTemplate
會將相關邏輯分離成獨立的互動實作,看似實用,但需要慎重判斷。
SmartDate 的主要繫結內容(DependencyProperty)
這個控制項包括一個名為
SelectedDate
的繫結內容,型別為
DateTime
?。由於預設值可以為空,因此聲明為
Nullable
型別,用於指定透過行事曆選擇的日期值。
SmartDate 樣版設計
ControlTemplate
設計中必需的基本組成部份如下:
Popup
ListBox
ToggleButton
Popup
用於包含
ListBox
,即行事曆;
ListBox
透過
ItemsPanelTemplate
使用
UniformGrid
實作行事曆;
ToggleButton
以行事曆圖示表示,當按鈕切換時,
Popup
的
IsOpen
內容也會改變,從而控制行事曆視窗。這種結構不僅在
SmartDate
控制項中適用,在基本的
DatePicker
控制項中也類似,因此對比
DatePicker
的開原始碼非常有益。
下面是
SmartDate
控制項的樣版結構。
SmartDate: ControlTemplate
<ControlTemplateTargetType="{x:Type units:SmartDate}">
<BorderBackground="{TemplateBinding Background}"
BorderBrush="{TemplateBinding BorderBrush}"
BorderThickness="{TemplateBinding BorderThickness}"CornerRadius="4">
<Grid>
<units:CalendarSwitchx:Name="PART_Switch"/>
<Popupx:Name="PART_Popup"StaysOpen="False">
<BorderBackground="{TemplateBinding Background}">
<james:JamesGridRows="Auto,Auto,Auto"Columns="*">
<james:JamesGridRows="*"Columns="Auto,*,Auto">
<units:ChevronButtonx:Name="PART_Left"Tag="Left"/>
<TextBlock style="{StaticResource Month style}"/>
<units:ChevronButtonx:Name="PART_Right"Tag="Right"/>
</james:JamesGrid>
<UniformGridColumns="7">
<units:DayOfWeekGrid.Column="0"Content="Su"/>
<units:DayOfWeekGrid.Column="1"Content="Mo"/>
<units:DayOfWeekGrid.Column="2"Content="Tu"/>
<units:DayOfWeekGrid.Column="3"Content="We"/>
<units:DayOfWeekGrid.Column="4"Content="Th"/>
<units:DayOfWeekGrid.Column="5"Content="Fr"/>
<units:DayOfWeekGrid.Column="6"Content="Sa"/>
</UniformGrid>
<units:CalendarBoxx:Name="PART_ListBox"/>
</james:JamesGrid>
</Border>
</Popup>
</Grid>
</Border>
</ControlTemplate>
從
ControlTemplate
可以看到,包含了之前提到的所有元素。
Popup
作為基礎控制項使用,
CalendarSwitch
是從
ToggleButton
繼承的行事曆切換按鈕。
CalendarBox
繼承自
ListBox
,用於選擇行事曆日期。
其他組成部份包括用於切換到上一個月或下一個月的按鈕、顯示當前月份的
TextBlock
以及用於顯示星期幾的設計元素。
非重用性內部專用 CustomControl
SmartDate
控制項不僅可以獨立使用,也可以在樣版內部實作為
CustomControl
。並非所有
CustomControl
都以通用控制項為目的。
SmartDate
具有特定的用途,這在
WPF
架構中是很常見的。
這種性質的控制項通常歸類為 '
Primitives
' 命名
空間。
ToggleButton
、
Thumb
、
ScrollBar
等控制項通常在其他控制項的內部使用。
基於這種
WPF
架構事實,可以看出
SmartDate
控制項的樣版設計與
WPF
基本模式沒有太大區別。
理解 PART_ 控制項項及其作用
在
CustomControl
結構中,程式碼與
XAML
之間沒有自動連線功能。兩者的互動完全依賴於
_PART
控制項。
常用的
_PART
控制項包括:
PART_Switch
PART_ListBox
PART_Left
PART_Right
這些控制項在
SmartDate
類的
OnApplyTemplate
方法中傳遞,處理按鈕事件、日期生成等所有必要操作。透過
OnApplyTemplate
接收的控制項名稱最好使用
PART_
字首命名,以便在
XAML
中預見類內部的處理邏輯。
SmartDate.cs 原始碼
以下是包含
CustomControl
核心實作的
SmartDate.cs
類檔,特別重要的部份包括:
聲明的 DependencyProperty
透過 OnApplyTemplate 定義 PART_ 元素
透過 SelectedDate 內容控制行事曆選擇邏輯
使用 CalendarBox 的 SelectedItem/SelectedValue
CustomControl: SmartDate.cs
using System;
using System.Collections.Generic;
using System.Linq;
using System.Text;
using System.Threading.Tasks;
using System.Windows;
using System.Windows.Controls;
using System.Windows.Controls.Primitives;
using System.Windows.Data;
using System.Windows.Documents;
using System.Windows.Input;
using System.Windows.Media;
using System.Windows.Media.Imaging;
using System.Windows.Navigation;
using System.Windows.Shapes;
namespaceSmartDateControl.UI.Units
{
public classSmartDate : Control
 {
private Popup _popup;
private CalendarSwitch _switch;
private CalendarBox _listbox;
publicbool KeepPopupOpen
 {
get { return (bool)GetValue(KeepPopupOpenProperty); }
set { SetValue(KeepPopupOpenProperty, value); }
 }
publicstaticreadonly DependencyProperty KeepPopupOpenProperty =
 DependencyProperty.Register("KeepPopupOpen", typeof(bool), typeof(SmartDate), new PropertyMetadata(true));
public DateTime CurrentMonth
 {
get { return (DateTime)GetValue(CurrentMonthProperty); }
set { SetValue(CurrentMonthProperty, value); }
 }
publicstaticreadonly DependencyProperty CurrentMonthProperty =
 DependencyProperty.Register("CurrentMonth", typeof(DateTime), typeof(SmartDate), new PropertyMetadata(null));
public DateTime? SelectedDate
 {
get { return (DateTime?)GetValue(SelectedDateProperty); }
set { SetValue(SelectedDateProperty, value); }
 }
publicstaticreadonly DependencyProperty SelectedDateProperty =
 DependencyProperty.Register("SelectedDate", typeof(DateTime?), typeof(SmartDate), new PropertyMetadata(null));
staticSmartDate()
 {
 Default styleKeyProperty.OverrideMetadata(typeof(SmartDate), new FrameworkPropertyMetadata(typeof(SmartDate)));
 }
publicoverridevoidOnApplyTemplate()
 {
base.OnApplyTemplate();
 _popup = (Popup)GetTemplateChild("PART_Popup");
 _switch = (CalendarSwitch)GetTemplateChild("PART_Switch");
 _listbox = (CalendarBox)GetTemplateChild("PART_ListBox");
 ChevronButton leftButton = (ChevronButton)GetTemplateChild("PART_Left");
 ChevronButton rightButton = (ChevronButton)GetTemplateChild("PART_Right");
 _popup.Closed += _popup_Closed;
 _switch.Click += _switch_Click;
 _listbox.MouseLeftButtonUp += _listbox_MouseLeftButtonUp;
 leftButton.Click += (s, e) => MoveMonthClick(-1);
 rightButton.Click += (s, e) => MoveMonthClick(1);
 }
privatevoidMoveMonthClick(int month)
 {
 GenerateCalendar(CurrentMonth.AddMonths(month));
 }
privatevoid _popup_Closed(object sender, EventArgs e)
 {
 _switch.IsChecked = IsMouseOver;
 }
privatevoid _switch_Click(object sender, RoutedEventArgs e)
 {
if (_switch.IsChecked == true)
 {
 _popup.IsOpen = true;
 GenerateCalendar(SelectedDate ?? DateTime.Now);
 }
 }
privatevoid _listbox_MouseLeftButtonUp(object sender, MouseButtonEventArgs e)
 {
if (_listbox.SelectedItem is CalendarBoxItem selected)
 {
 SelectedDate = selected.Date;
 GenerateCalendar(selected.Date);
 _popup.IsOpen = KeepPopupOpen;
 }
 }
privatevoidGenerateCalendar(DateTime current)
 {
if (current.ToString("yyyyMM") == CurrentMonth.ToString("yyyyMM")) return;
 CurrentMonth = current;
 _listbox.Items.Clear();
 DateTime fDayOfMonth = new(current.Year, current.Month, 1);
 DateTime lDayOfMonth = fDayOfMonth.AddMonths(1).AddDays(-1);
int fOffset = (int)fDayOfMonth.DayOfWeek;
int lOffset = 6 - (int)lDayOfMonth.DayOfWeek;
 DateTime fDay = fDayOfMonth.AddDays(-fOffset);
 DateTime lDay = lDayOfMonth.AddDays(lOffset);
for (DateTime day = fDay; day <= lDay; day = day.AddDays(1))
 {
 CalendarBoxItem boxItem = new();
 boxItem.Date = day;
 boxItem.DateFormat = day.ToString("yyyyMMdd");
 boxItem.Content = day.Day;
 boxItem.IsCurrentMonth = day.Month == current.Month;
 _listbox.Items.Add(boxItem);
 }
if (SelectedDate != null)
 {
 _listbox.SelectedValue = SelectedDate.Value.ToString("yyyyMMdd");
 }
 }
 }
}
首先,檢視
DependencyProperty
,包括最重要的
SelectedDate
,以及保持彈出視窗開啟的
KeepPopupOpen
內容和記錄當前月份的
CurrentMonth
內容。這些內容在基礎
DatePicker
中是不存在的。
GenerateCalendar
方法包含了根據選擇日期生成新行事曆的邏輯。值得註意的是
Offset
計算部份。根據當前日期生成行事曆時包含前後月份的日期,這部份邏輯是行事曆生成的關鍵。
DateTime fDayOfMonth = new(current.Year, current.Month, 1);
DateTime lDayOfMonth = fDayOfMonth.AddMonths(1).AddDays(-1);
int fOffset = (int)fDayOfMonth.DayOfWeek;
int lOffset = 6 - (int)lDayOfMonth.DayOfWeek;
DateTime fDay = fDayOfMonth.AddDays(-fOffset);
DateTime lDay = lDayOfMonth.AddDays(lOffset);
在事件處理方式上,使用
MouseLeftButtonUp
處理行事曆選擇事件,匹配一般按鈕點選操作。相比
SelectionChanged
事件,選擇相同值時不會觸發事件,這樣的處理方式更為適合。
ToggleButton
的
IsChecked
、
Popup
的
IsOpen
及其關閉相關的互動透過事件實作。這些復雜的互動最好透過實際實作進行學習。
關於擴充套件實作
這個應用程式是為教程制作的程式碼,可以透過添加功能進行擴充套件。比如添延長間選擇功能或手動更改值。也可以根據客戶需求實作自訂行事曆顯示。
SmartDate 實作的 WPF 教程視訊及源碼介紹
SmartDate
控制項的全部實作過程可以透過
BiliBili
視訊檢視,也可以在
GitHub
上找到。這些視訊時長約
50
分鐘,制作耗時 近
1
個月。作為高品質的免費教學資源,建議大家花足夠的時間慢慢反復練習和學習。
溝通與支持
我們隨時保持溝通渠道開放。大家可以透過以下方式與我們互動:
GitHub [3] : 關註、Fork、Stars
BiliBili [4] : 一鍵三連
參考資料
[1]
源碼連結:
https://github.com/vickyqu115/smartdate
教學視訊:
https://bit.ly/3xI9DNh
GitHub:
https://github.com/vickyqu115/smartdate
BiliBili:
https://bit.ly/3xI9DNh


